 |
 |
|||||||||||||||||||||||||||||||||||||||||||||||||||||||||
 |
||||||||||||||||||||||||||||||||||||||||||||||||||||||||||
|
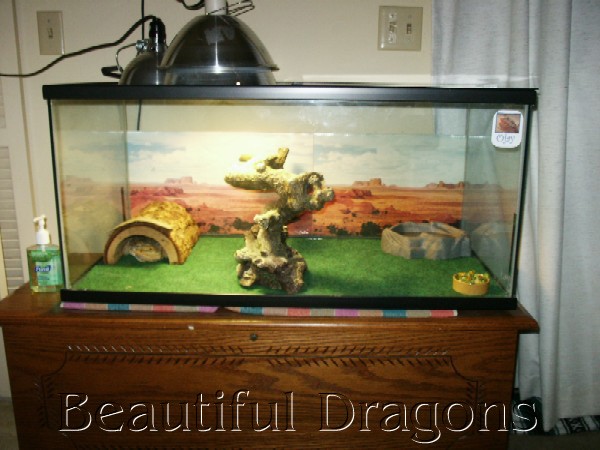
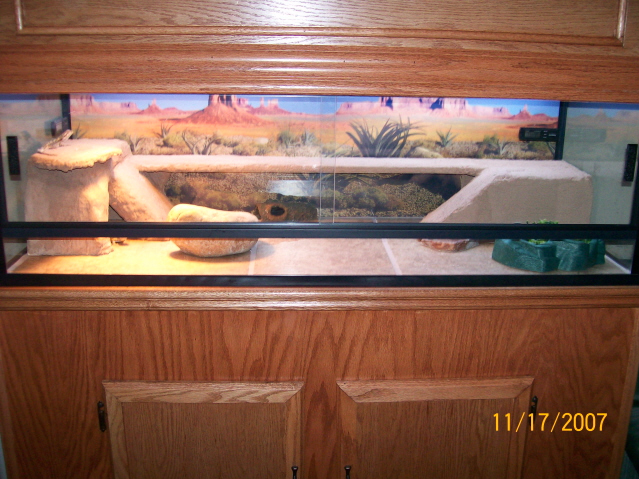
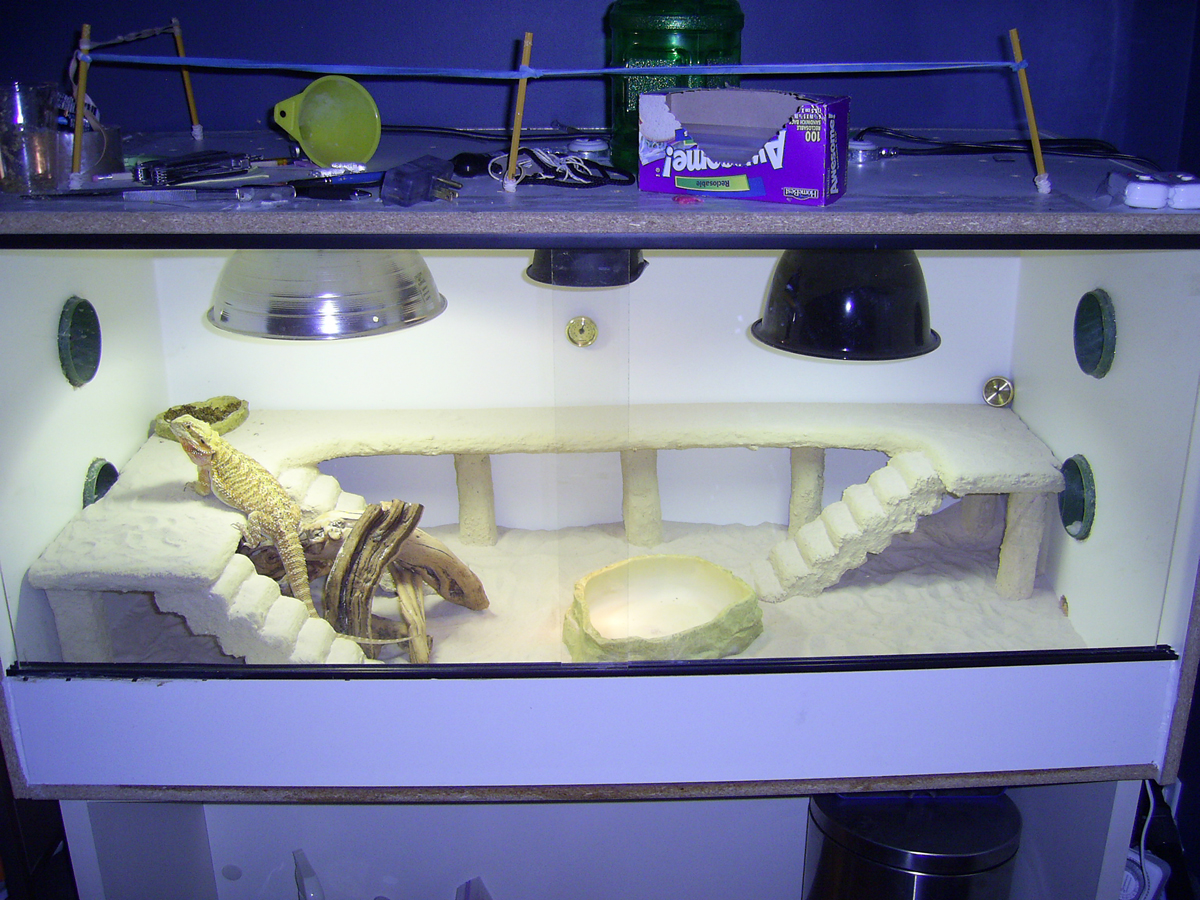
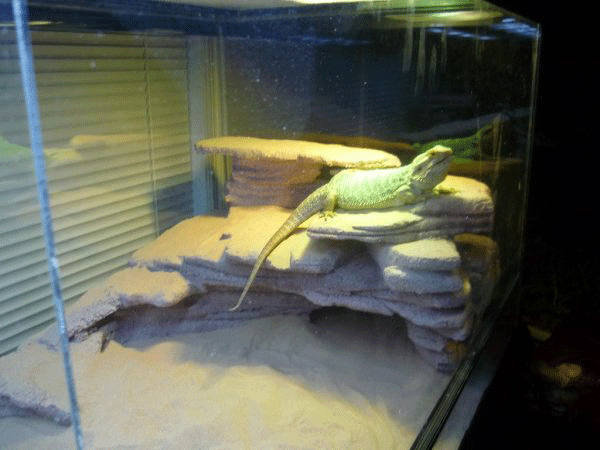
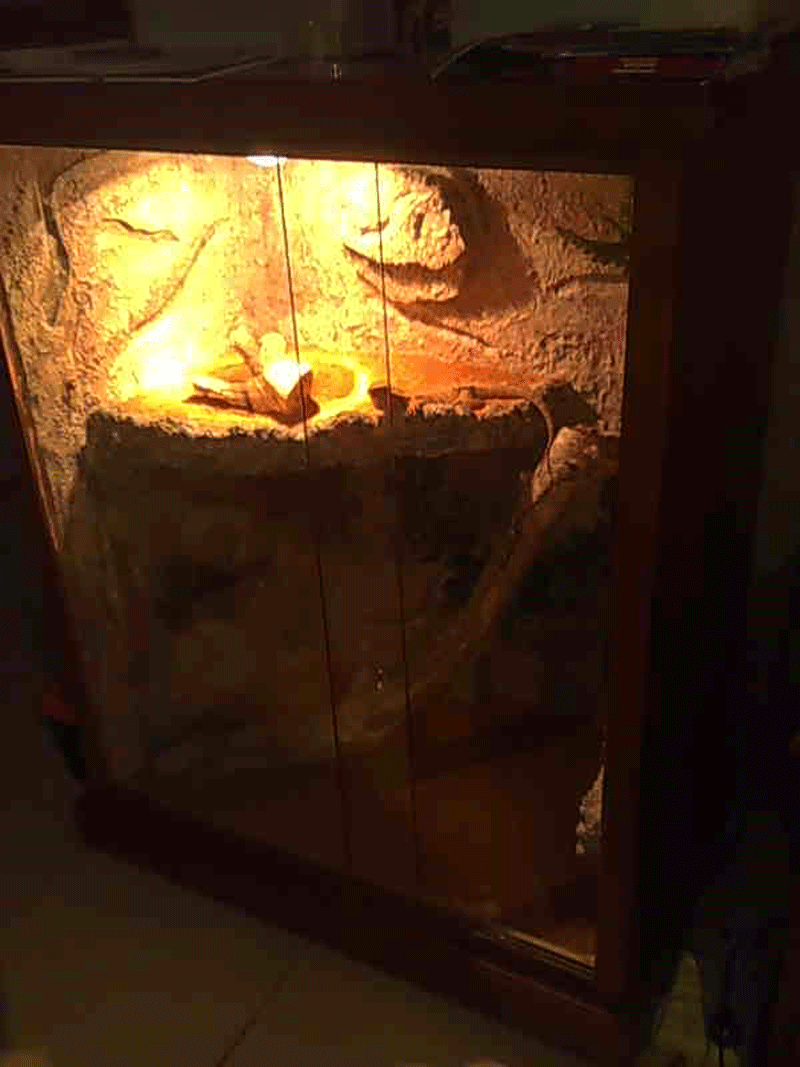
Making a custom basking platform can be very rewarding. I decided to make a fairly large basking platform for Ojay that has a hide under it. When finished, it should fill about one-quarter of his 55-gallon enclosure. Not only will this new platform offer him a surface with an angled slope so he can get as close to the UV rays as possible, but it will add more surface area to his cage. It will not be attached to the cage so it will be easy to remove for cleaning. It will also be waterproof and sealed so I can spray it down with Nolvasan or bleach without harming it. Below is a photo of his current enclosure (click on photo to enlarge it)... |
||||||||||||||||||||||||||||||||||||||||||||||||||||||||||
 |
||||||||||||||||||||||||||||||||||||||||||||||||||||||||||
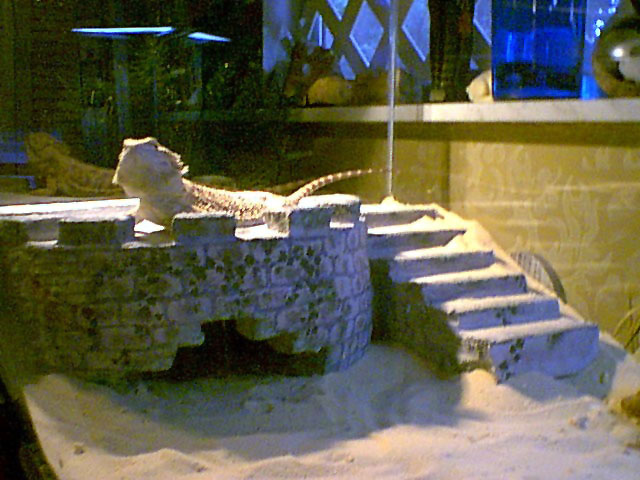
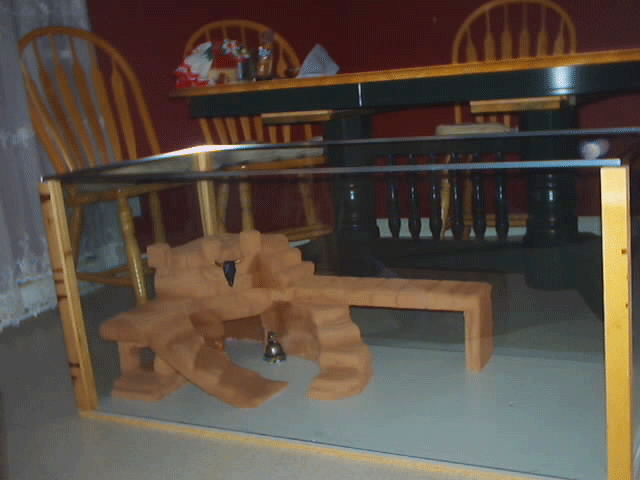
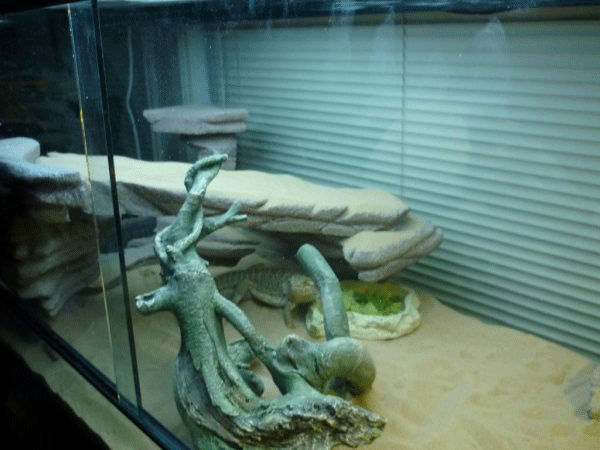
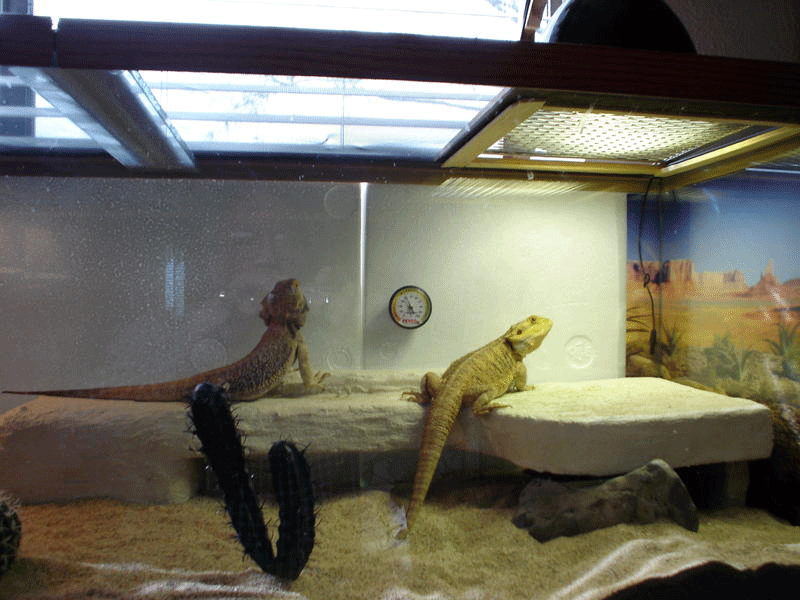
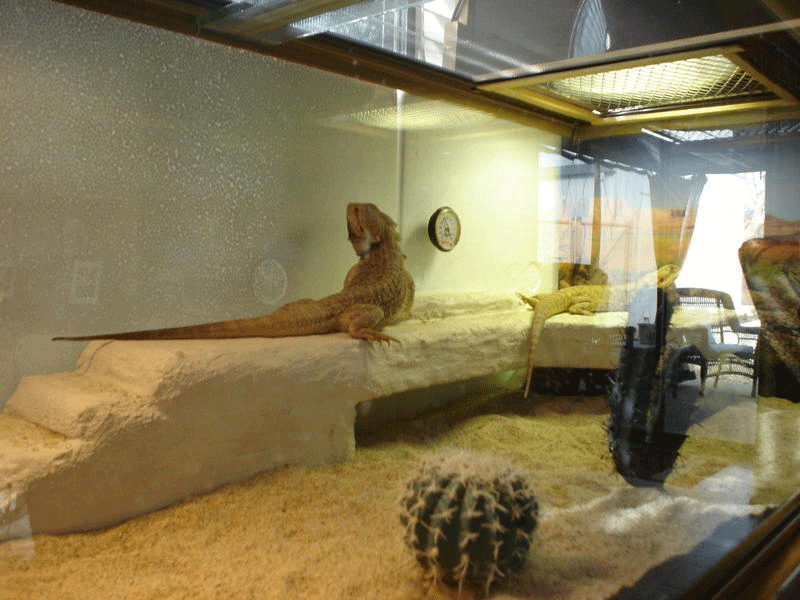
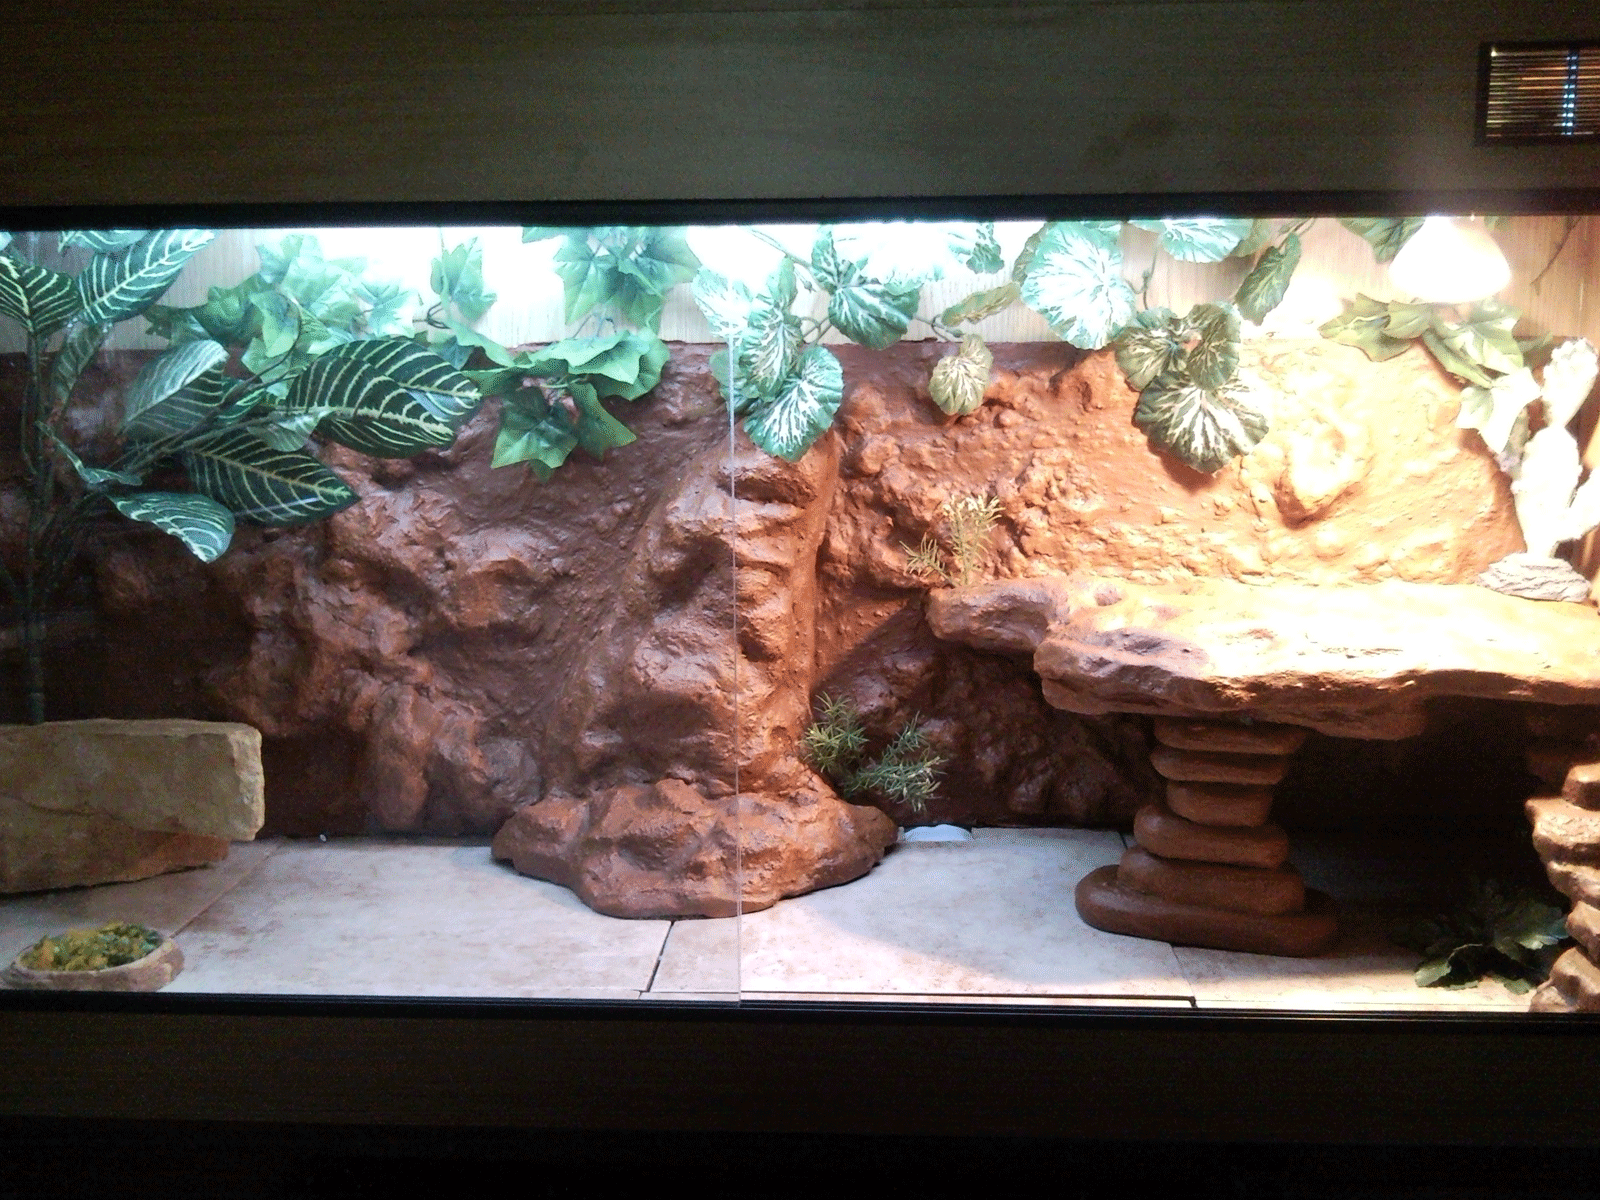
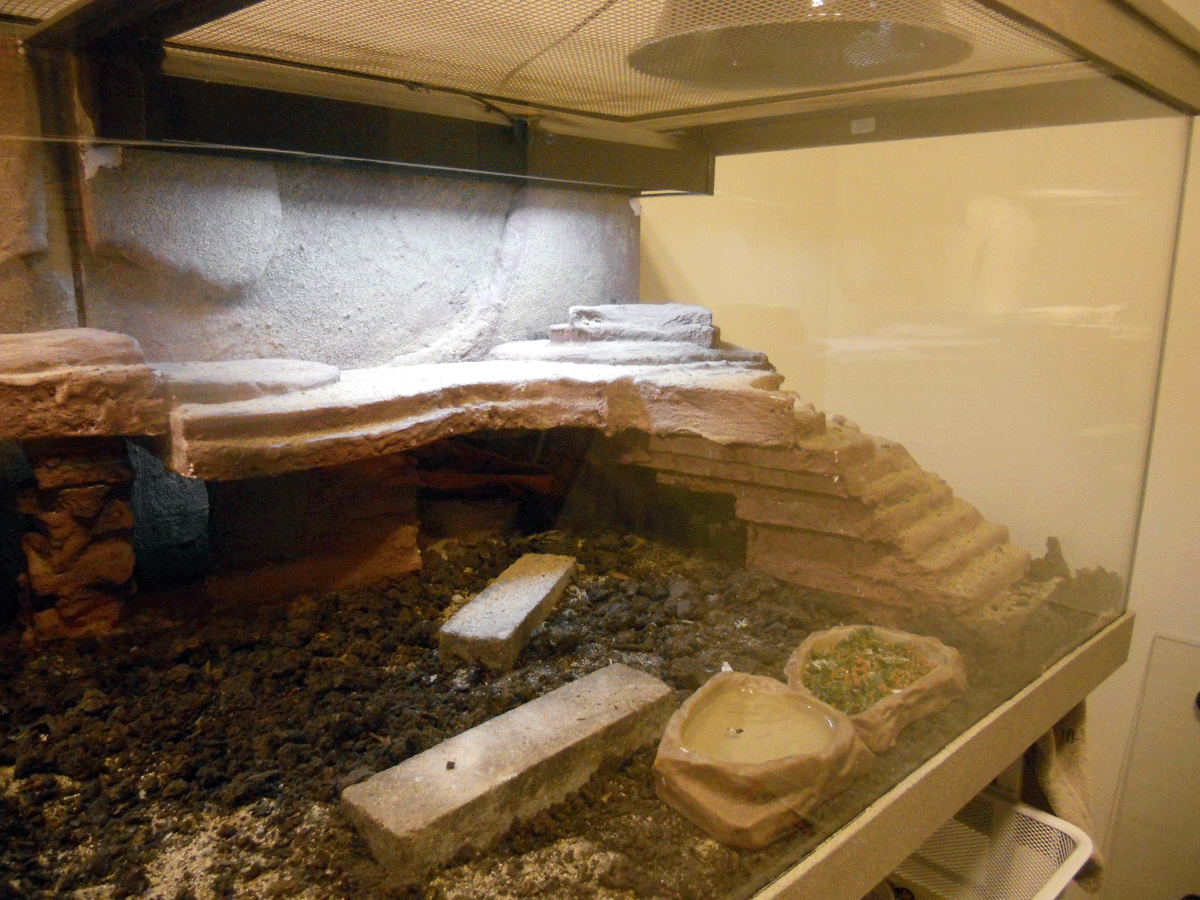
| There's nothing spectacular about Ojay's enclosure or furnishings, and I hope to change that. | ||||||||||||||||||||||||||||||||||||||||||||||||||||||||||
|
Step 1 - I'm a visual person and I needed to sketch something out on paper before I started cutting. I wanted the platform to fit into the corner of his cage to be more secure. And I wanted the sloping sides to not be so steep that it would make climbing difficult for an older beardie. Step
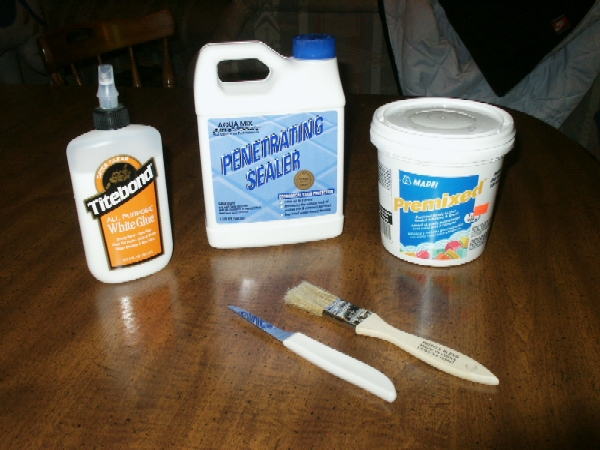
2 - Get your supplies. The following list is what I purchased at
Lowes: These
are items I had around the house that I used: |
||||||||||||||||||||||||||||||||||||||||||||||||||||||||||
 |
||||||||||||||||||||||||||||||||||||||||||||||||||||||||||
|
Supplies
I purchased (click to enlarge photo)
|
||||||||||||||||||||||||||||||||||||||||||||||||||||||||||
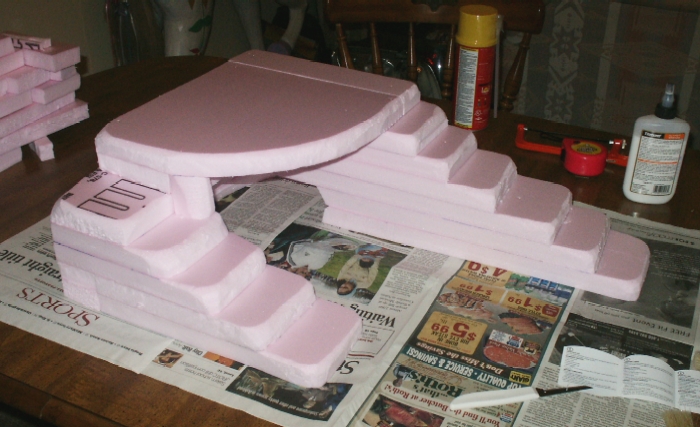
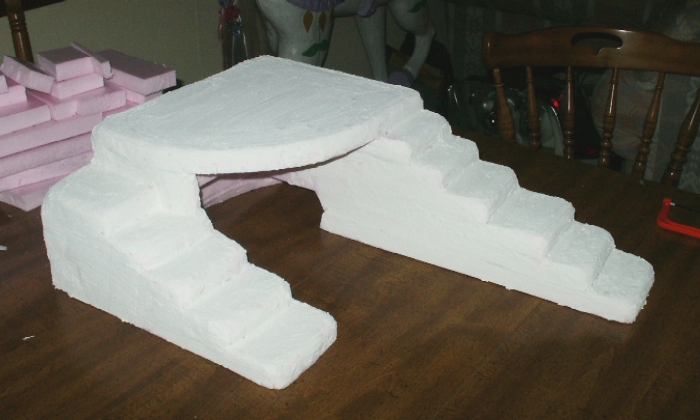
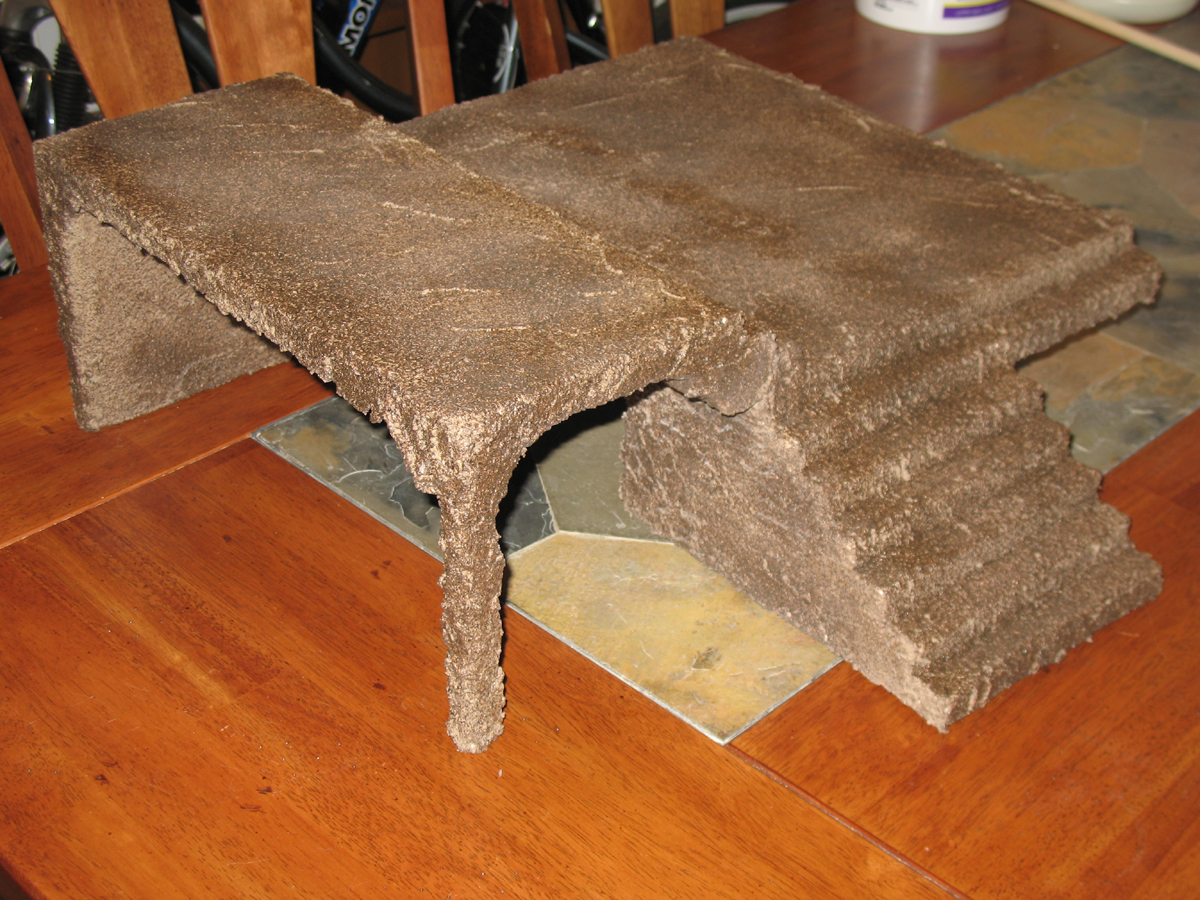
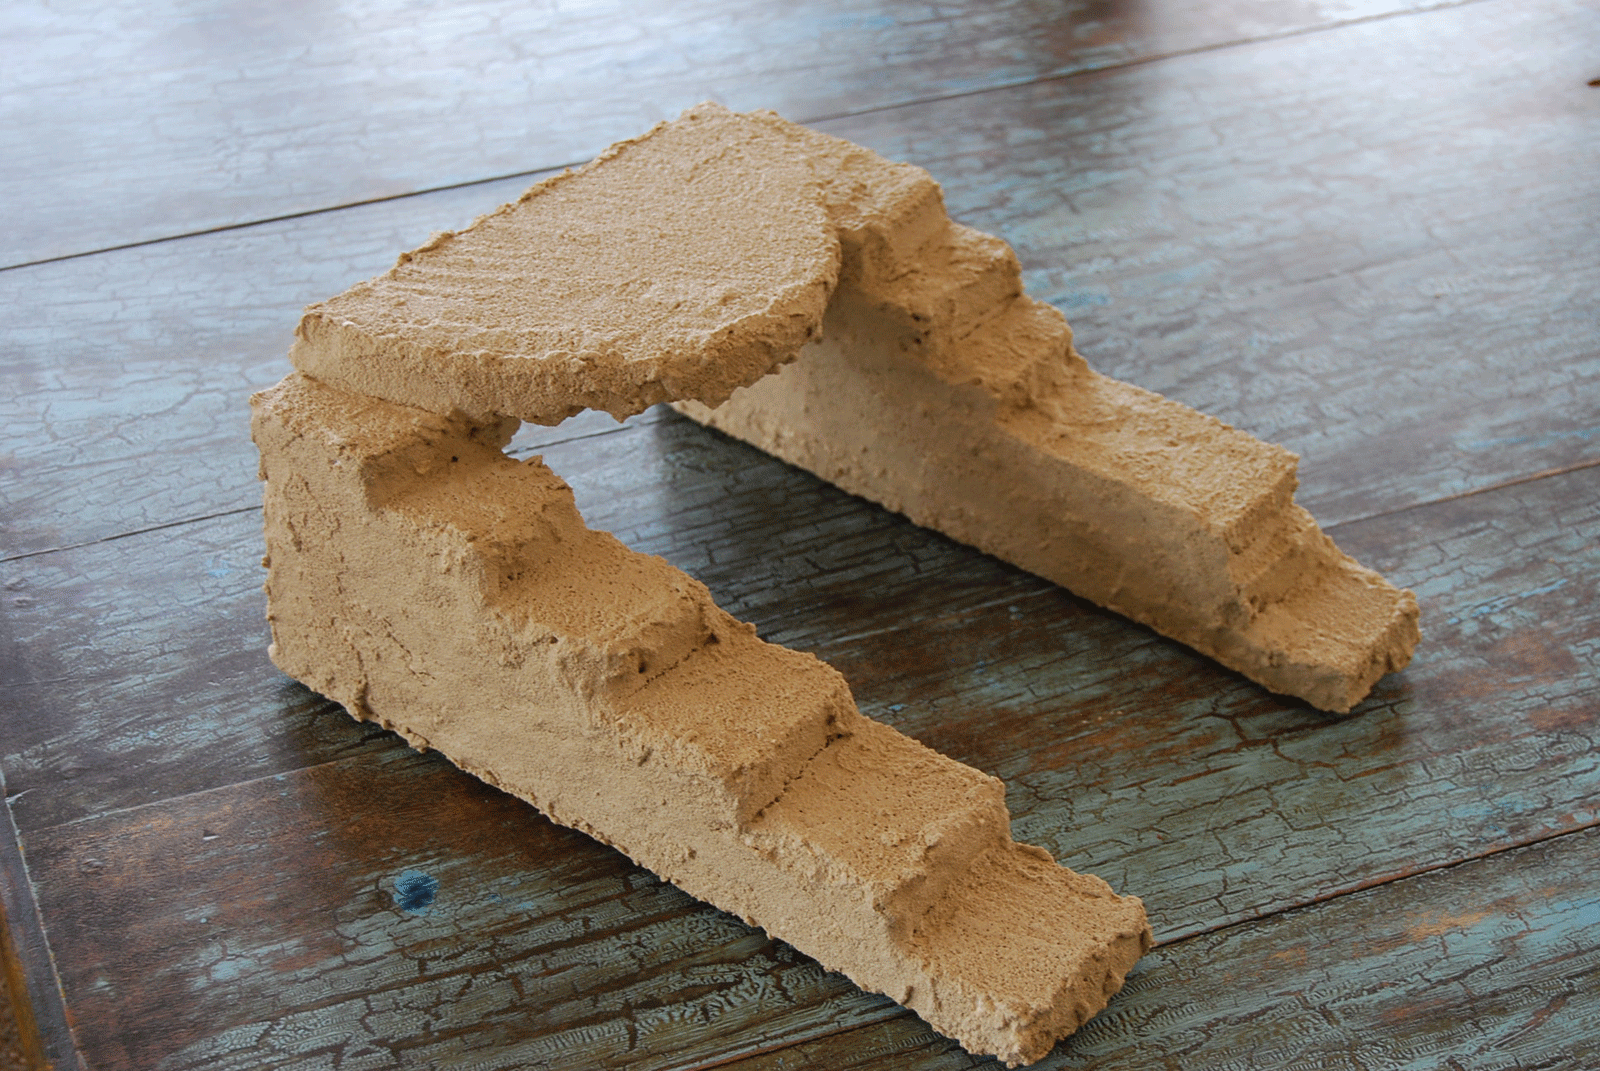
| Step 3 - Cut up the polystyrene, and work your way from the bottom up to the top to shape the platform. I had so much extra polystyrene that I really wasn't worried about messing up. I probably have enough extra to make two platforms. I decided that I wanted the platform to be 7" tall, so I needed 7 one inch layers. I rounded all the edges with a sharp knife. You can use an Exacto knife, but I used a very sharp pumpkin carving knife. It worked really well because it had a thin, sharp blade that was slightly bendable. I also carved out caves on the underside of the platform. After about an hour of cutting and carving the polystyrene, this is what I came up with... | ||||||||||||||||||||||||||||||||||||||||||||||||||||||||||
 |
||||||||||||||||||||||||||||||||||||||||||||||||||||||||||
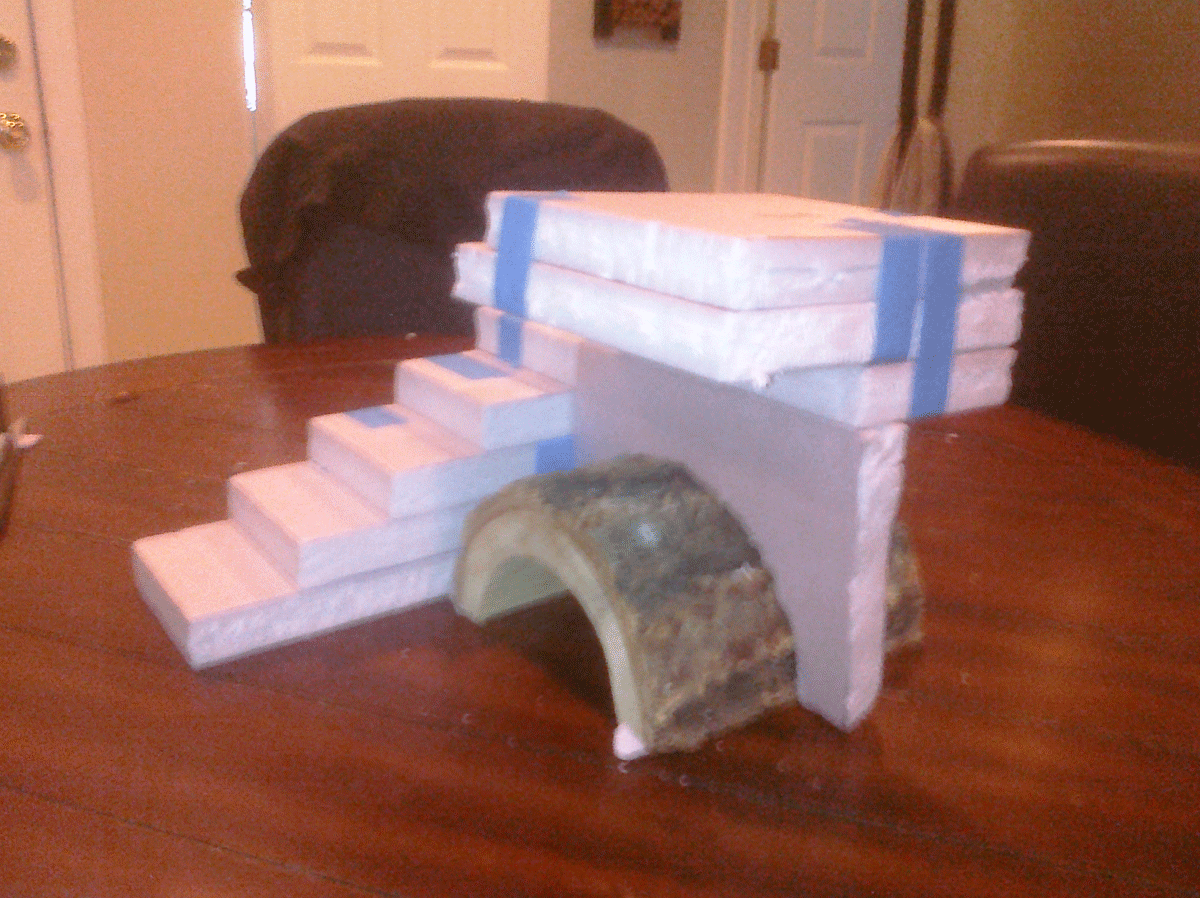
| Step 4 - Starting with the bottom layers, glue the layers together one at a time. After I got 3 layers glued together I pushed toothpicks into the polystyrene to keep it from sliding around. After it's all glued together, let it dry overnight. | ||||||||||||||||||||||||||||||||||||||||||||||||||||||||||
|
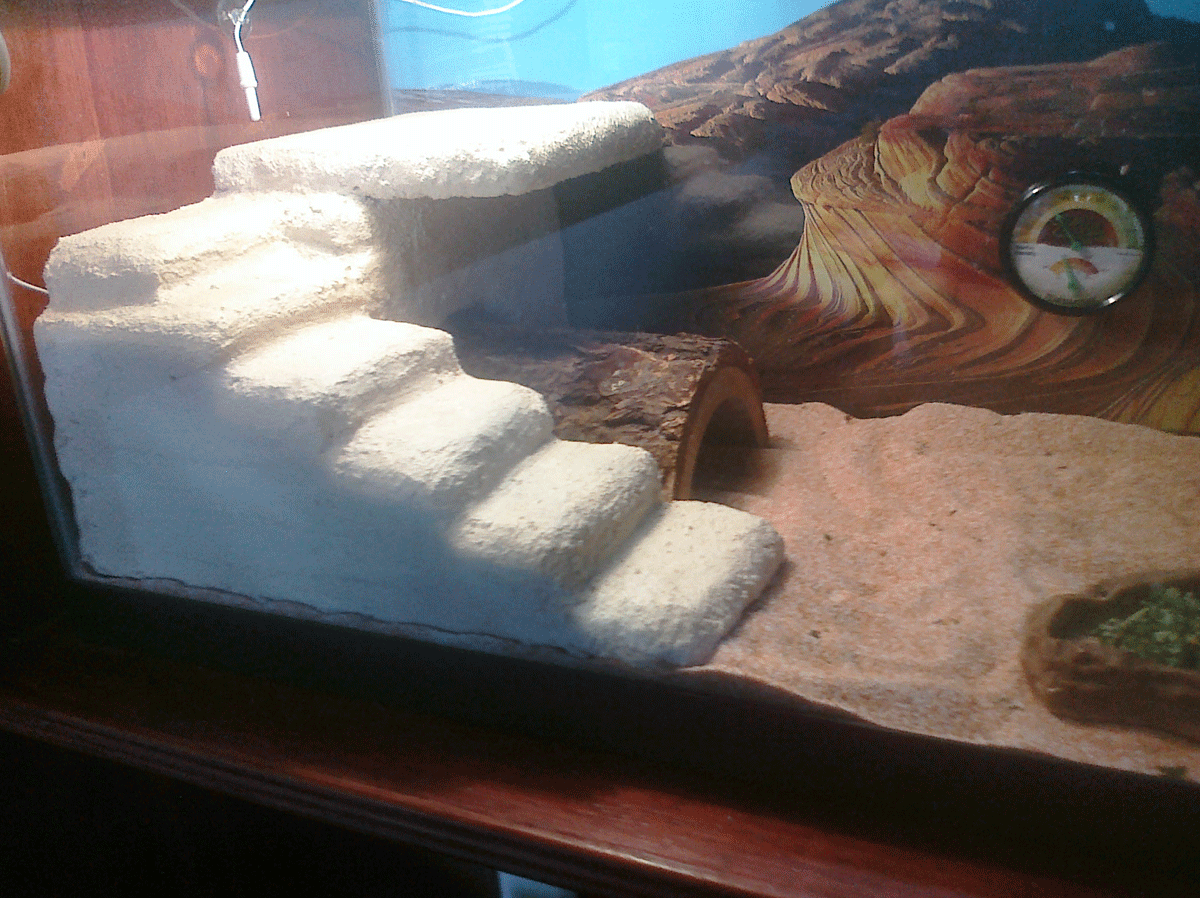
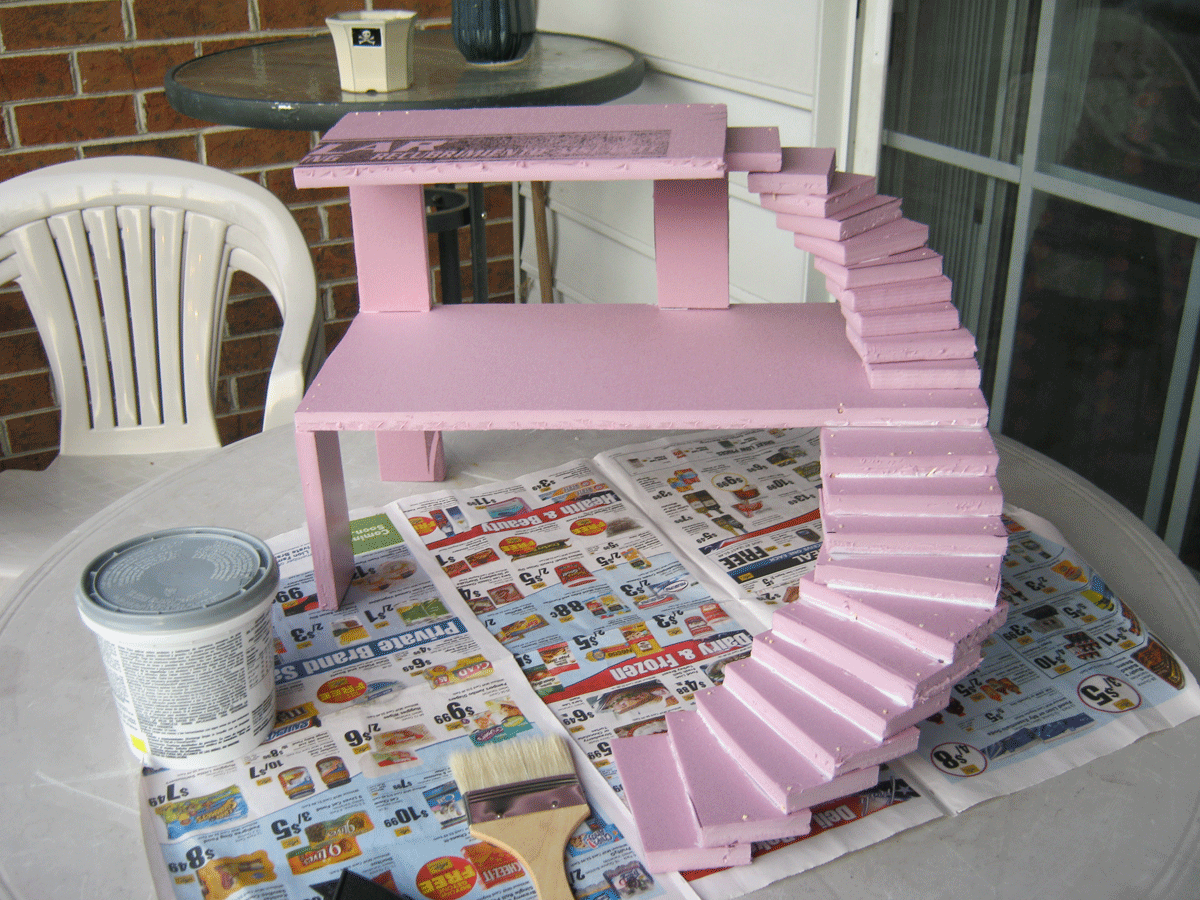
Step 5 - Grout time! I bought the premixed grout, because I didn't want to mix it up and make a huge mess. Even though the premixed costs a little more, I'm sure glad I got it! But if you're making a lot of platforms it would probably be wise to buy the grout in powder form. All you do is add water. It is important to work outside or in a well ventilated area during the next few steps. The grout and sealant contain odors that can harm us and our reptiles! With an old butter knife or putty knife, scoop up the grout and smear it onto the polystyrene. I found that it was easier to first smear on a thin layer with the knife, then smooth it out with a damp paint brush. (And I liked the rough texture the paint brush made in the grout.) You don't want to make the first layer of grout too thick, it is better to put on a few thin layers instead of one or two thick ones. Let each layer of grout get good and dry before applying the next layer. This is what it looked like after the first layer of grout... |
||||||||||||||||||||||||||||||||||||||||||||||||||||||||||
 |
||||||||||||||||||||||||||||||||||||||||||||||||||||||||||
|
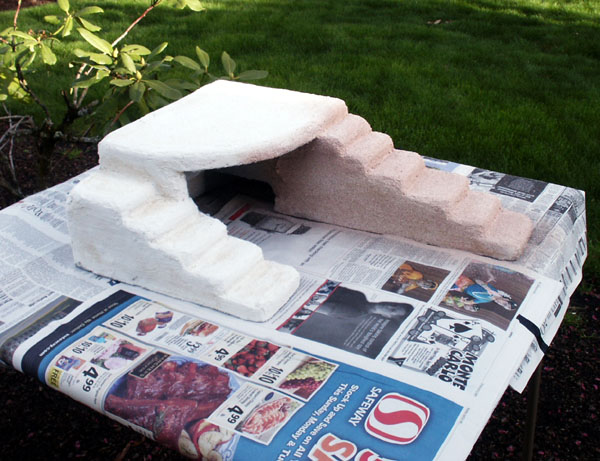
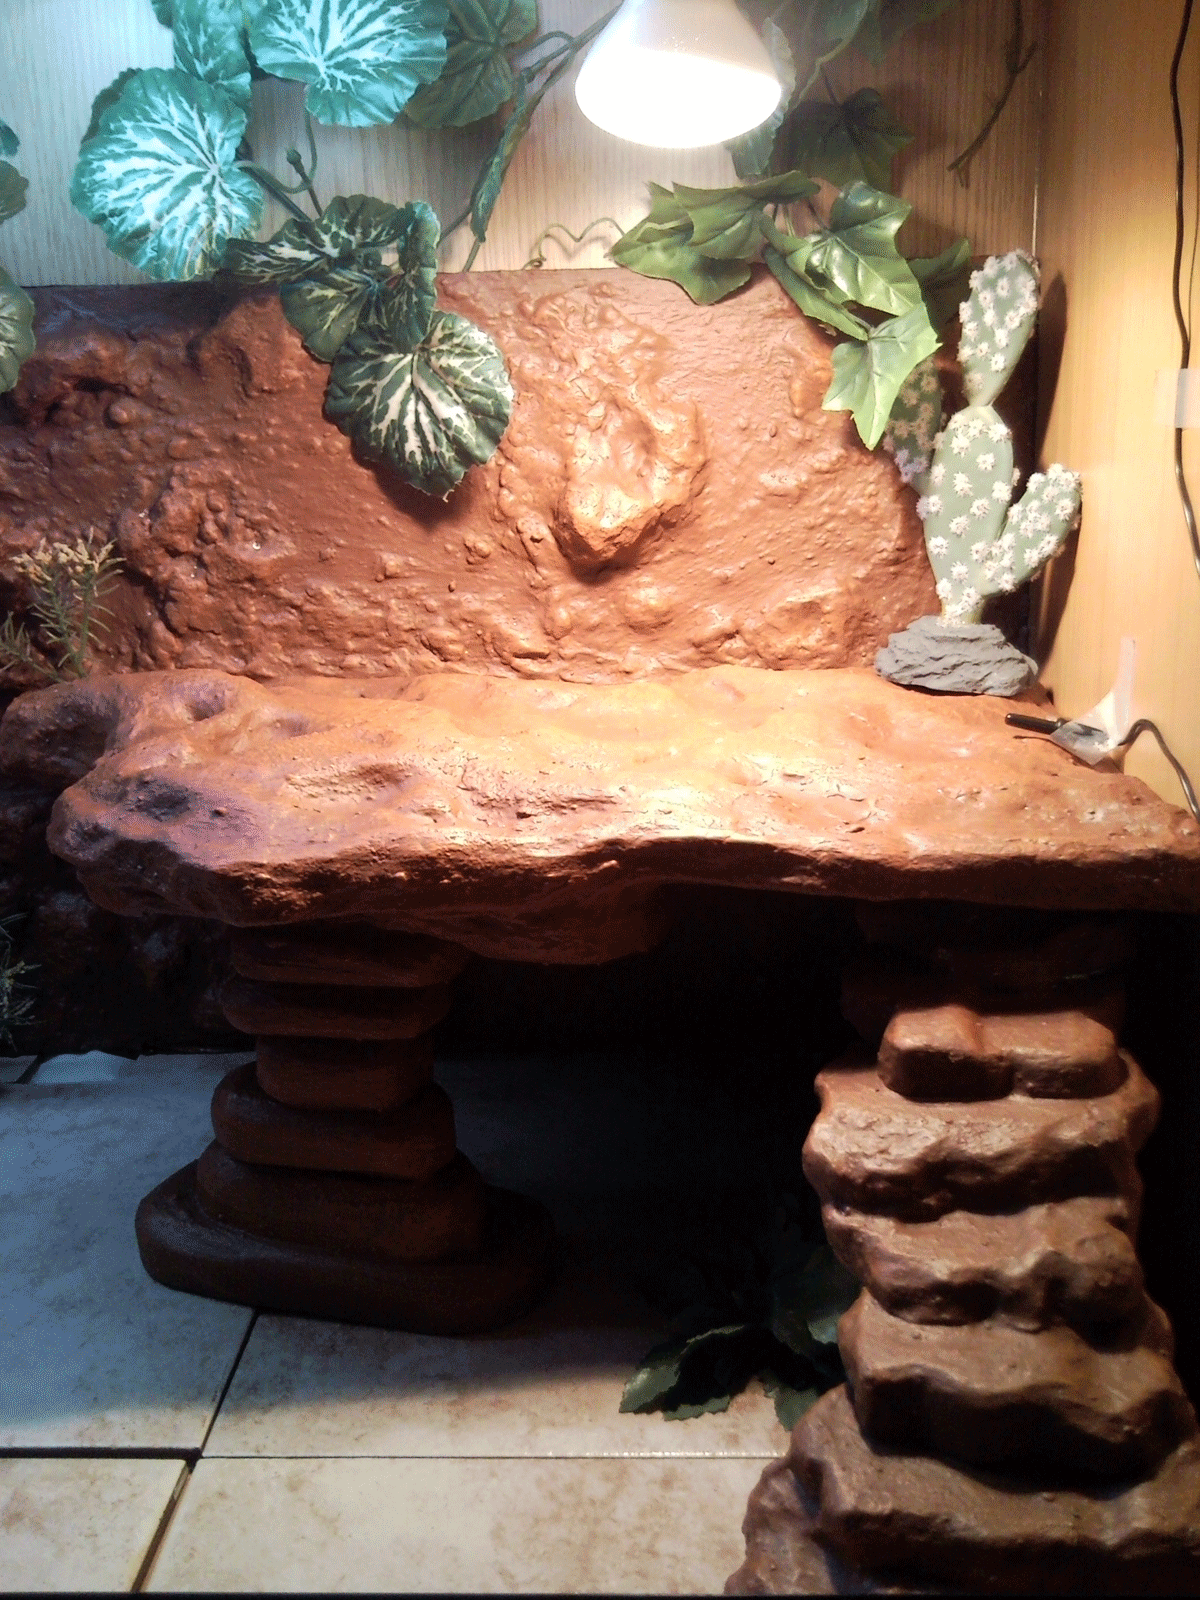
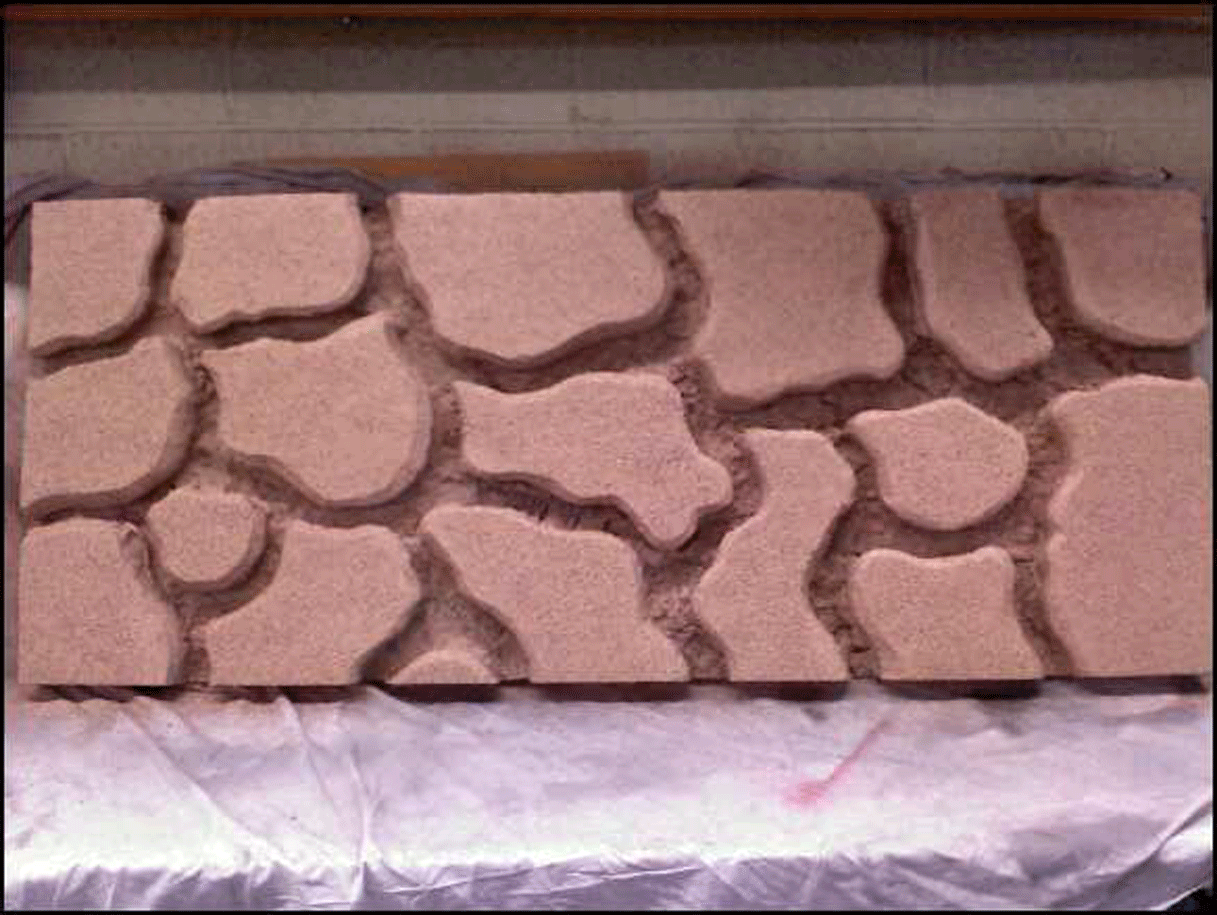
Step 6 - After several layers of grout, I applied the grout sealant and "threw" sand on it. I didn't have a lot of luck getting much sand to stick. I decided to paint over the grout and sealant with something called "Weathered Stone." It's a textured paint that is used to make something look like stone. And it worked really well! Looks a lot better than the sand throwing approach. |
||||||||||||||||||||||||||||||||||||||||||||||||||||||||||
 |
||||||||||||||||||||||||||||||||||||||||||||||||||||||||||
 |
||||||||||||||||||||||||||||||||||||||||||||||||||||||||||
|
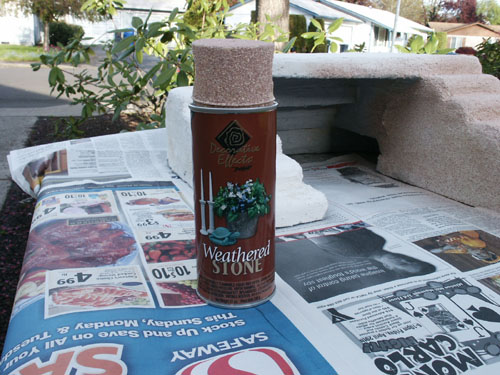
The photo above on the left was taken just after I started to spray on the weathered stone paint. You can see a big difference already! The photo on the right is the can of weathered stone paint. I got it at Lowe's for about $7. After the paint dried, I applied a weatherproof sealant. This sealant is made by the same company as Weathered Stone paint and is the recommended sealant for this product. |
||||||||||||||||||||||||||||||||||||||||||||||||||||||||||
 |
||||||||||||||||||||||||||||||||||||||||||||||||||||||||||
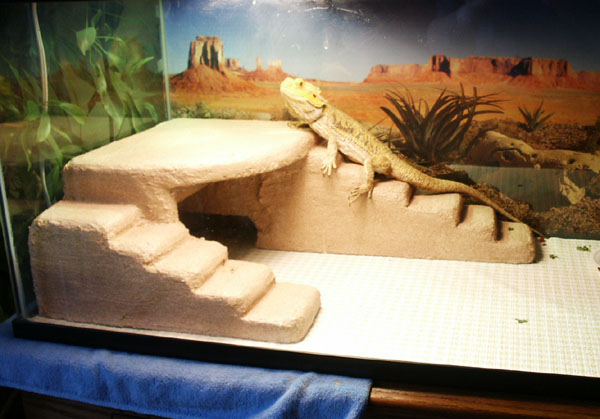
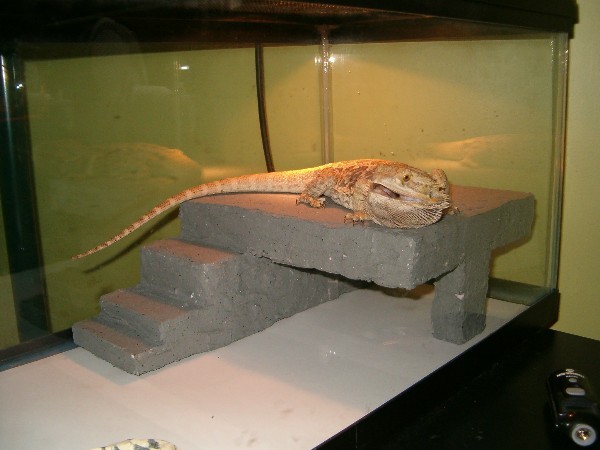
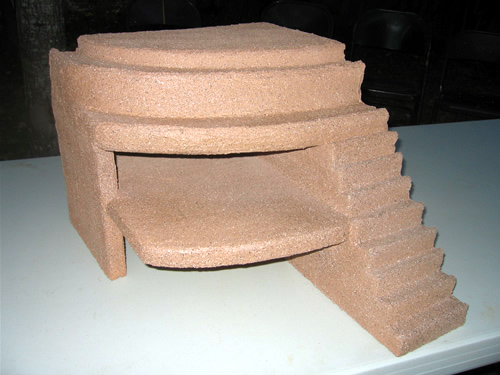
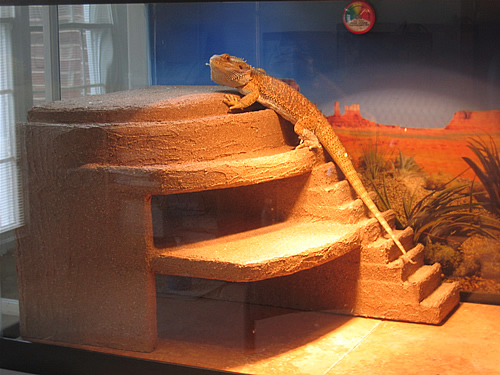
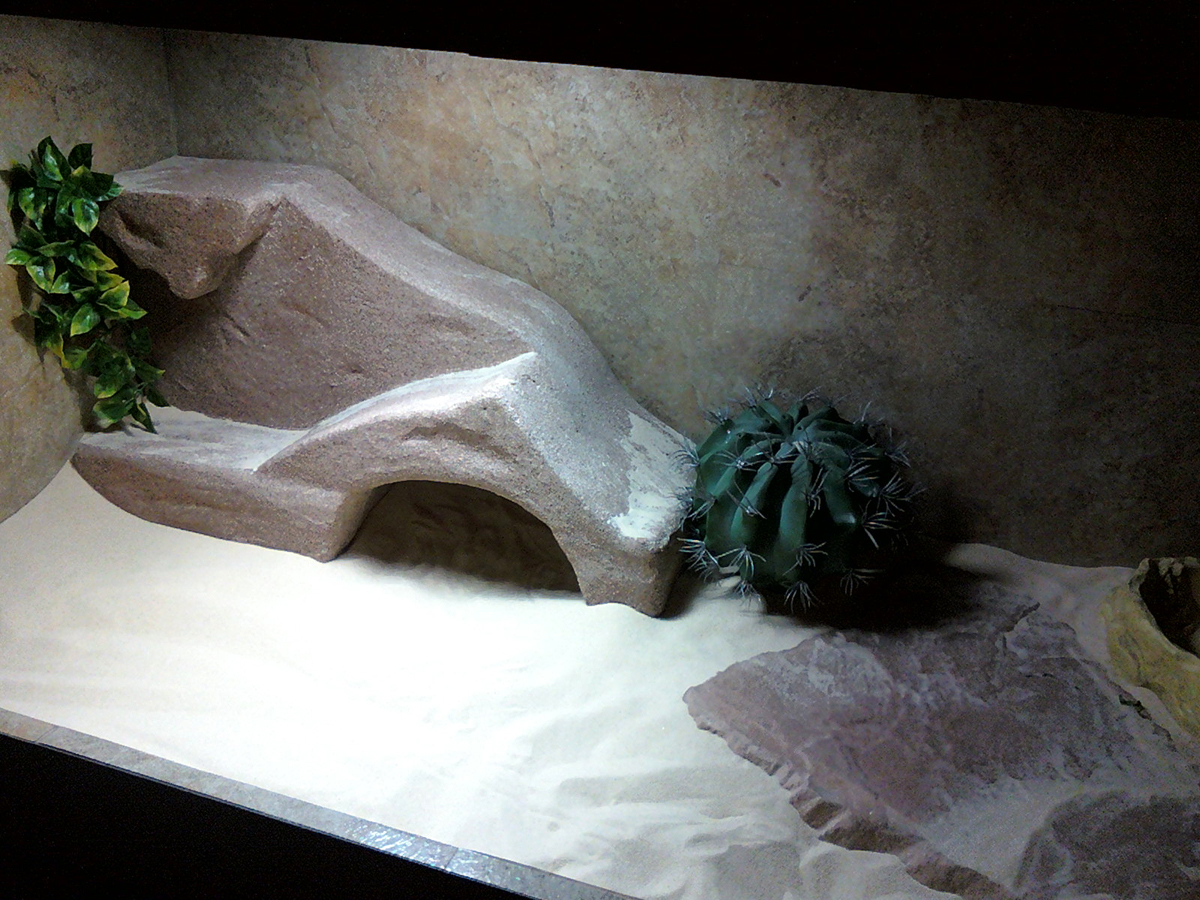
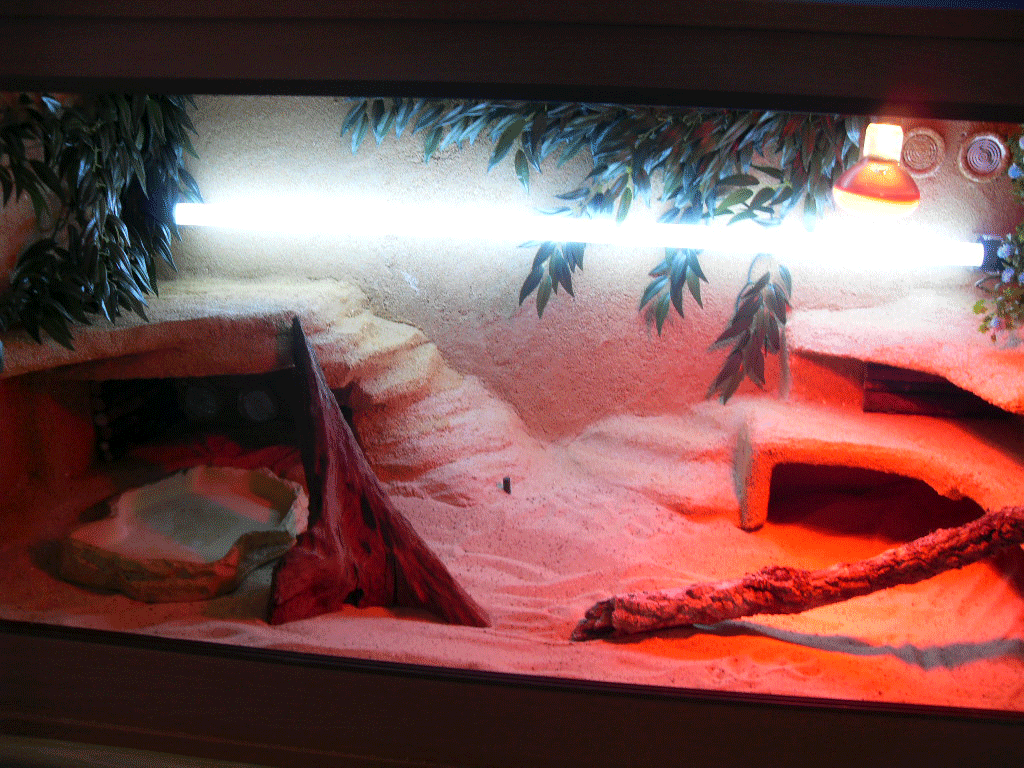
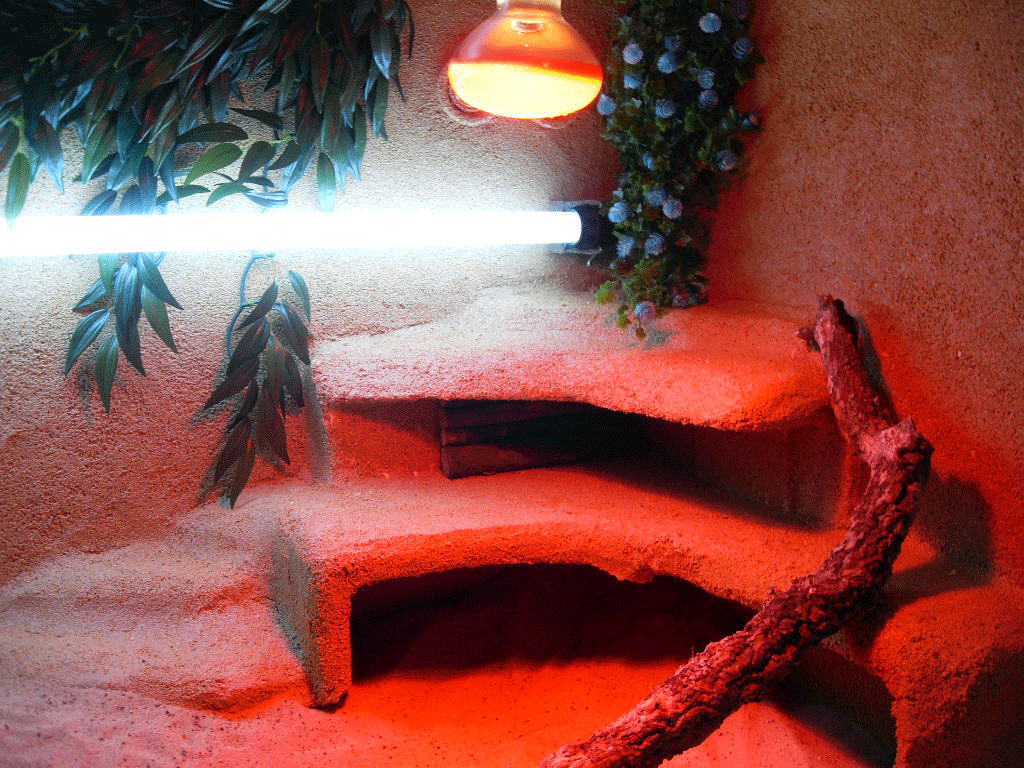
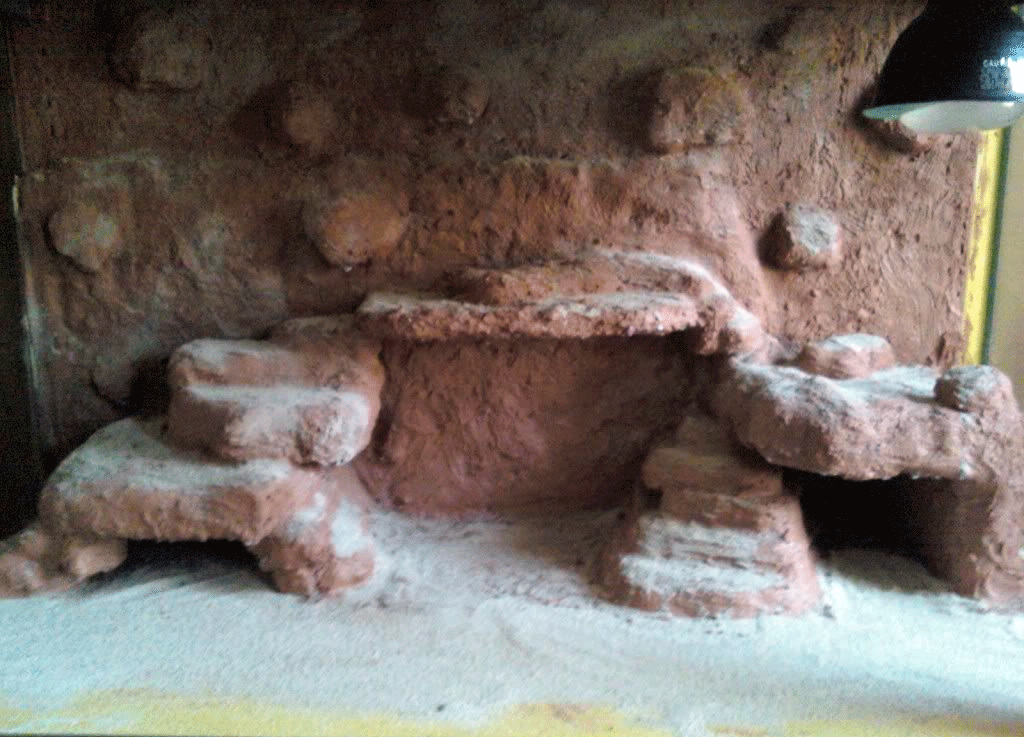
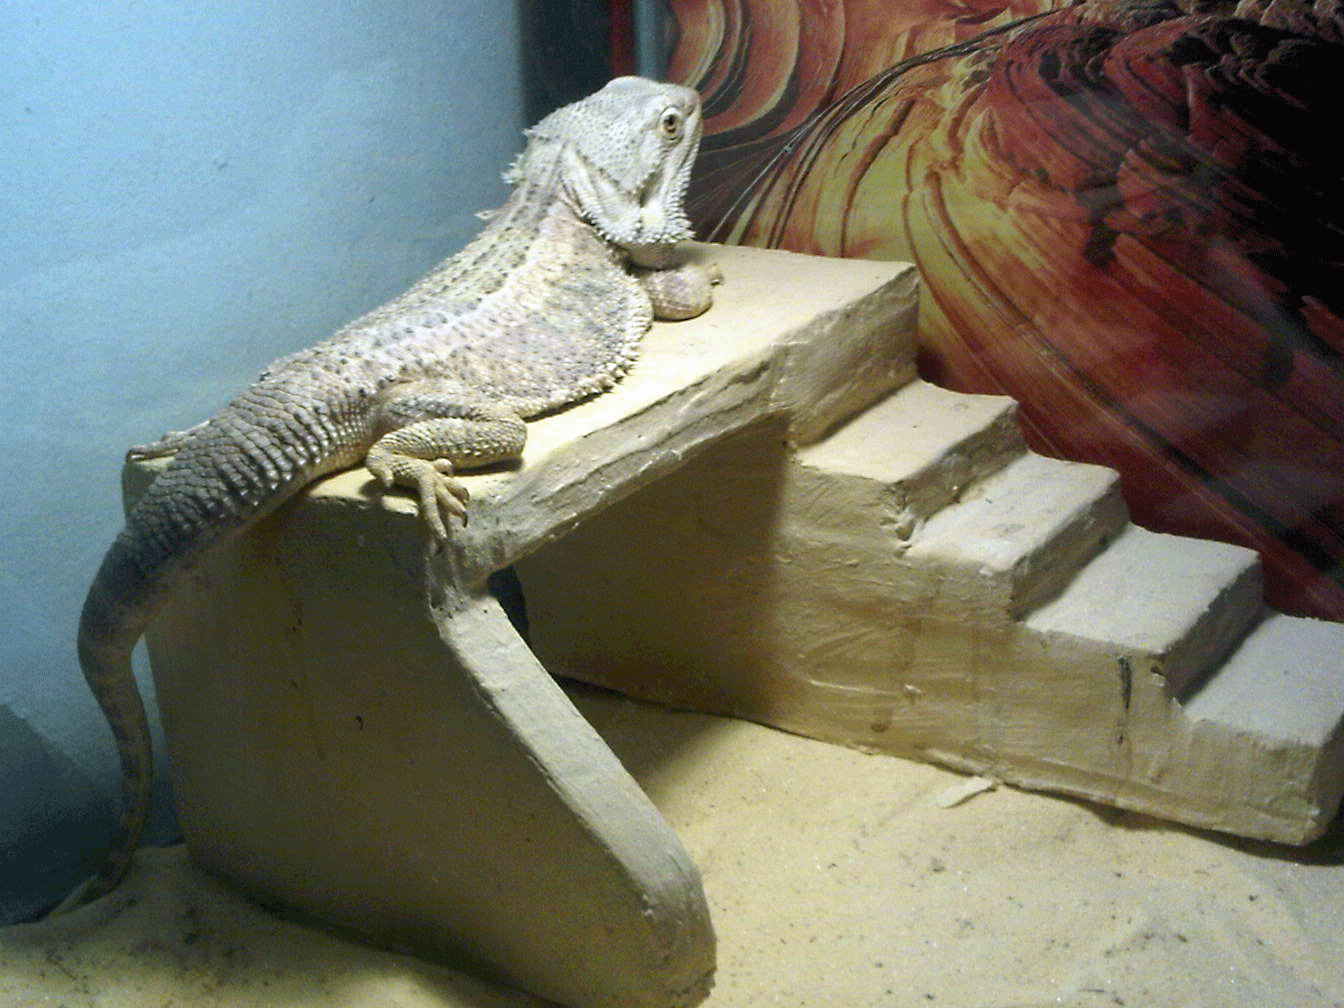
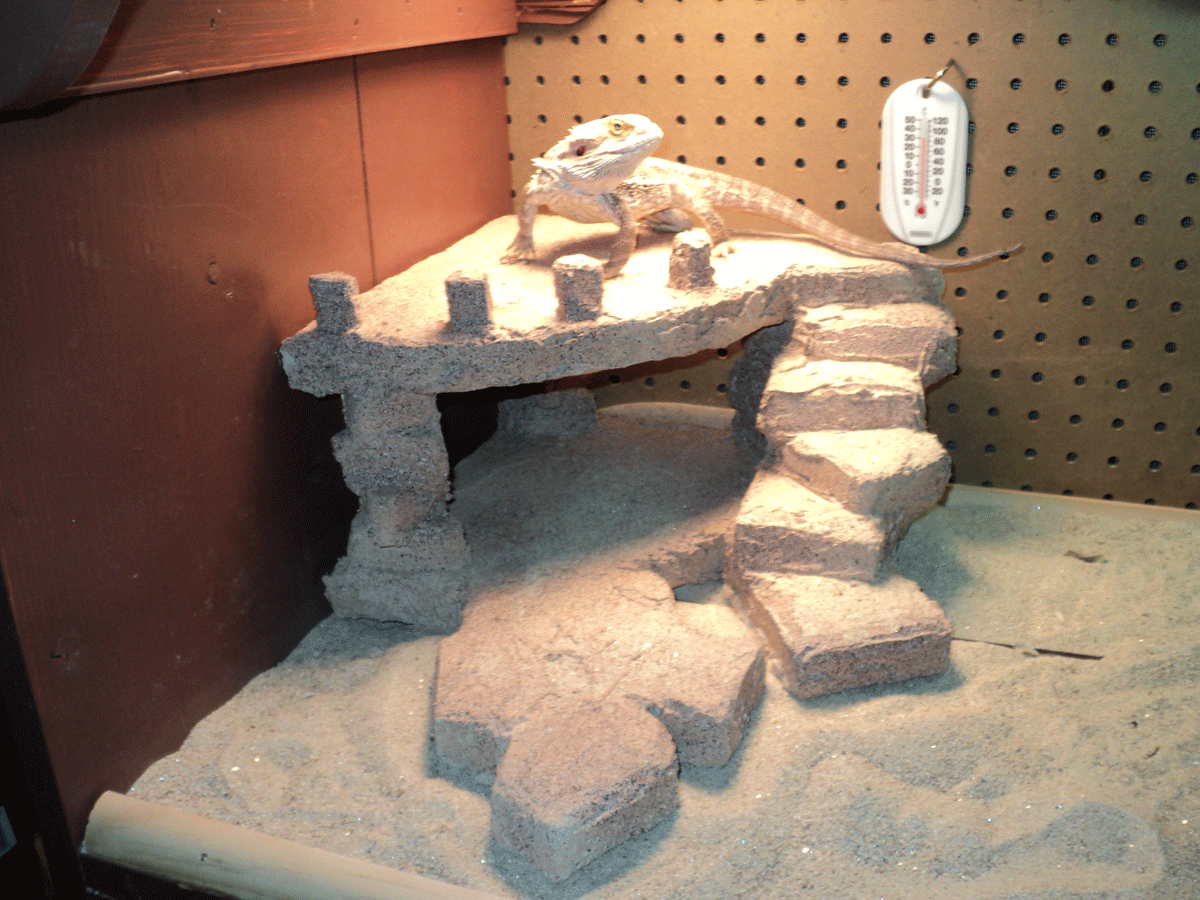
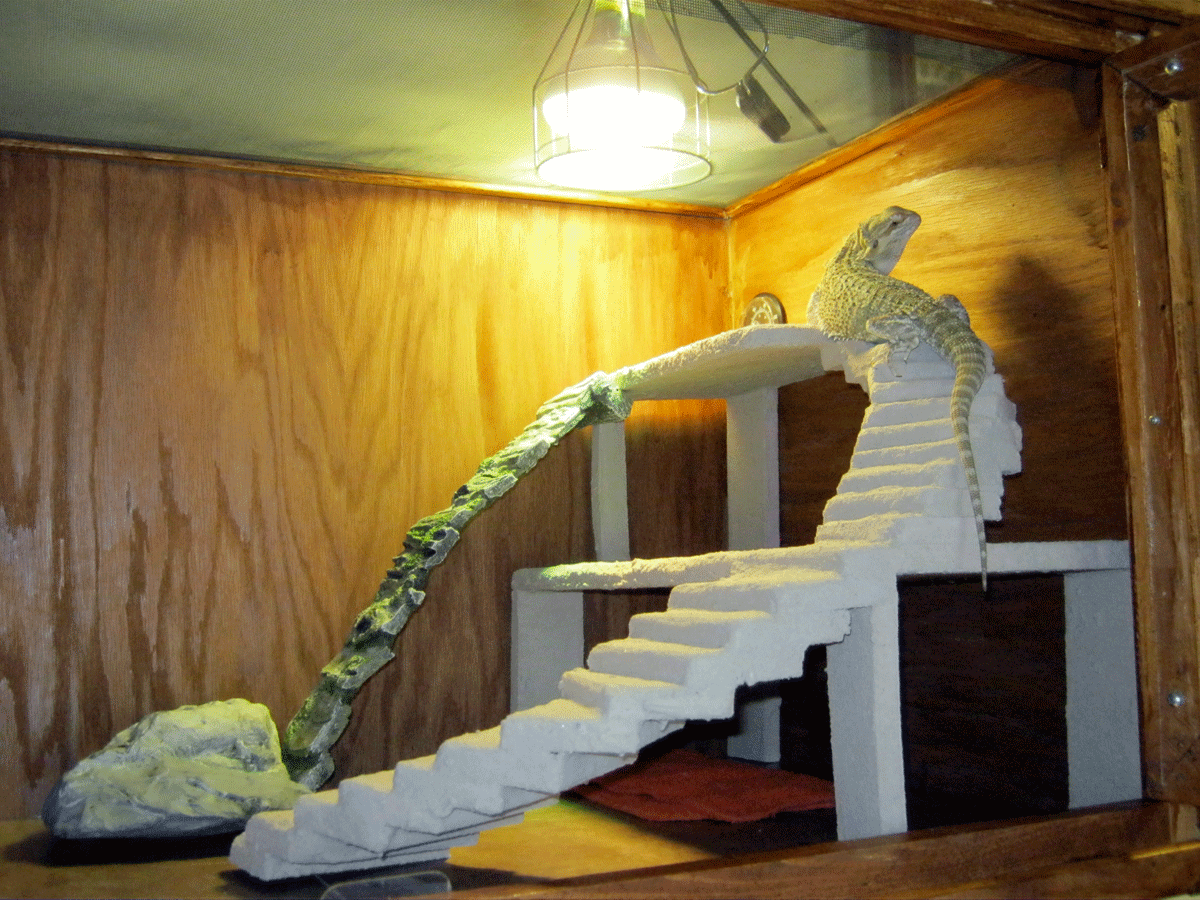
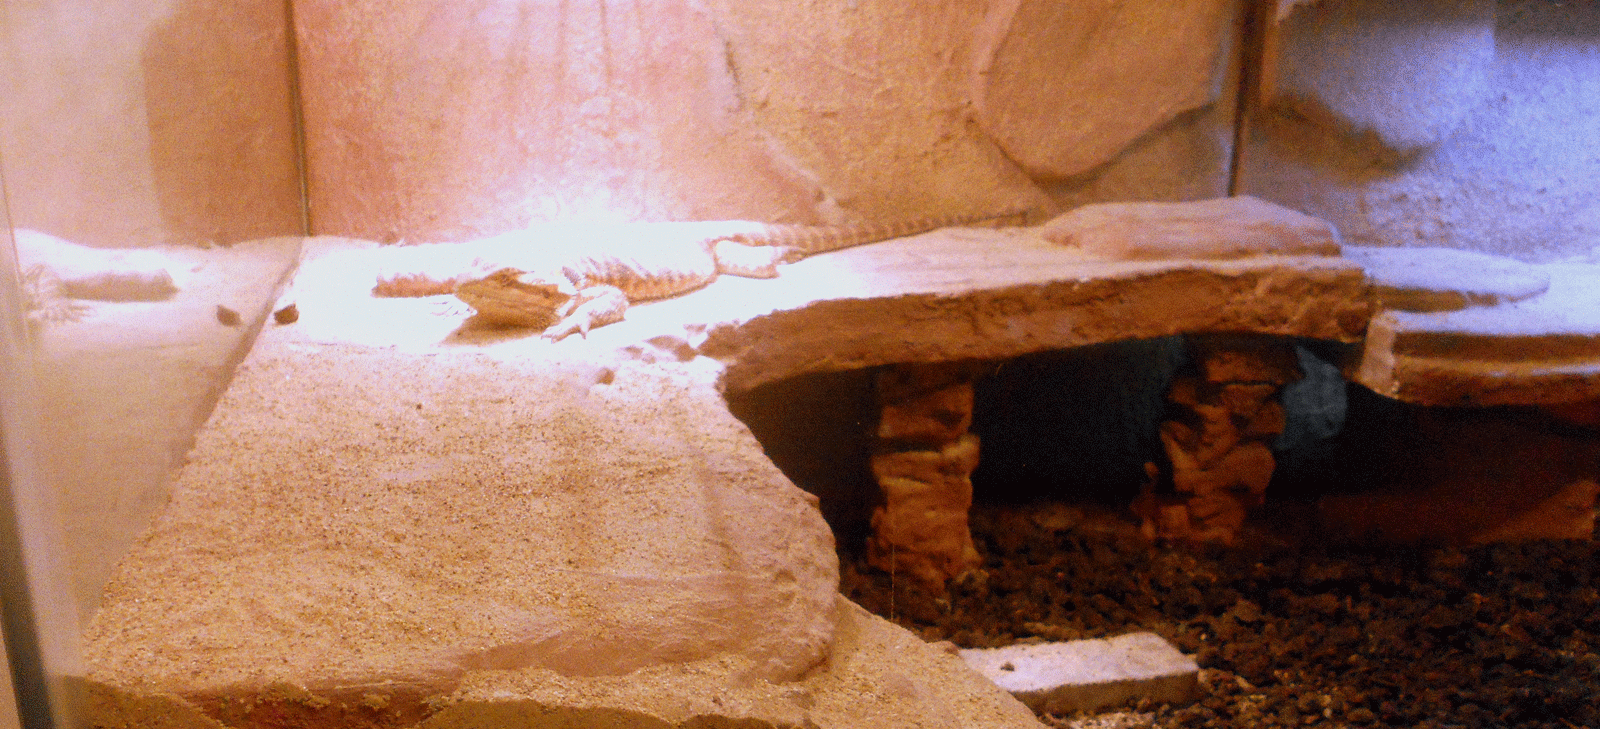
| Voila! All done! After waiting a few days to make sure there were no fumes, I cleaned it and put it in Ojay's cage. He loves his new cage furniture! | ||||||||||||||||||||||||||||||||||||||||||||||||||||||||||
|
Check
out these platforms that other beardie owners have built...
|
||||||||||||||||||||||||||||||||||||||||||||||||||||||||||
 |
 |
|||||||||||||||||||||||||||||||||||||||||||||||||||||||||
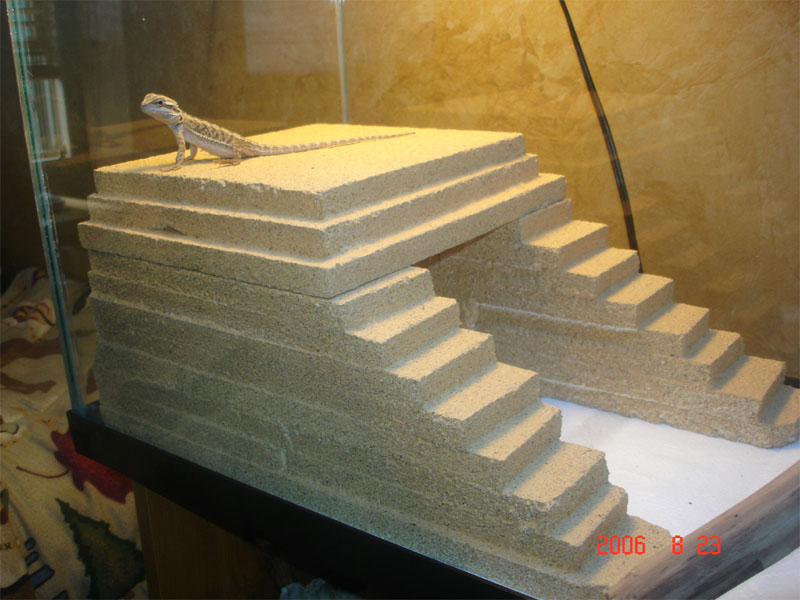
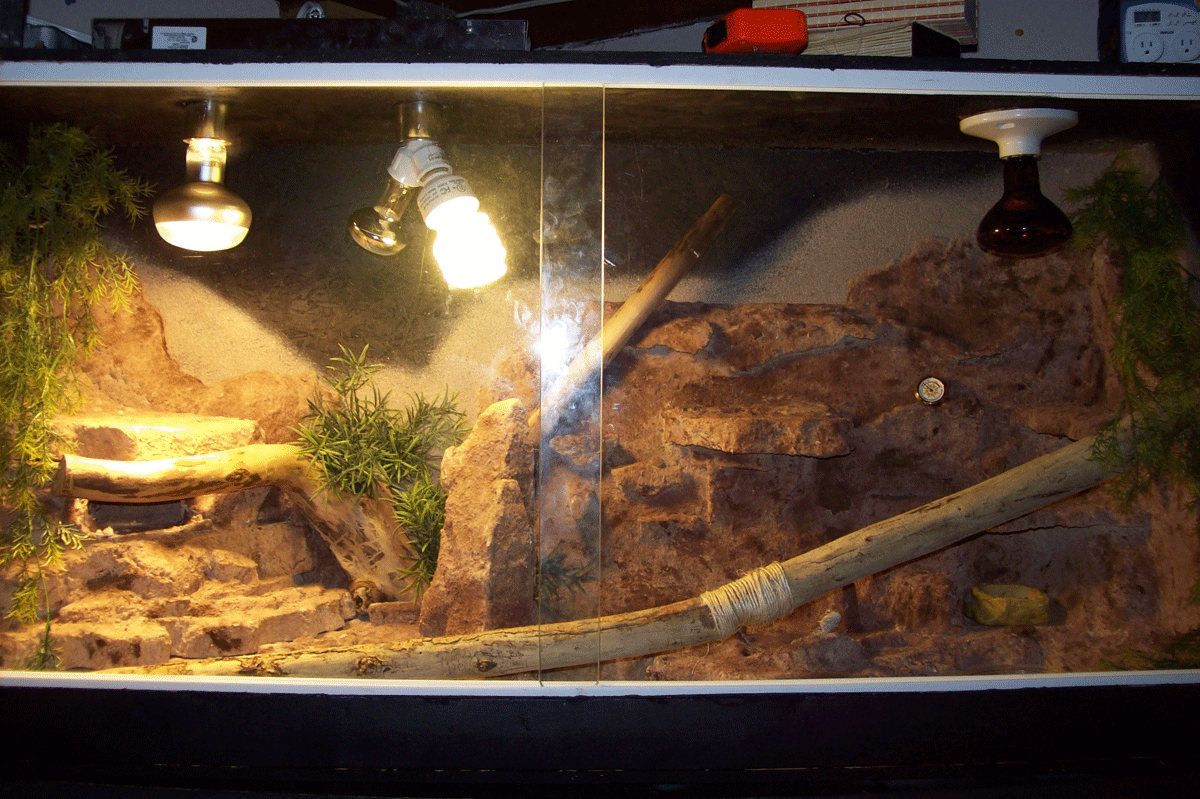
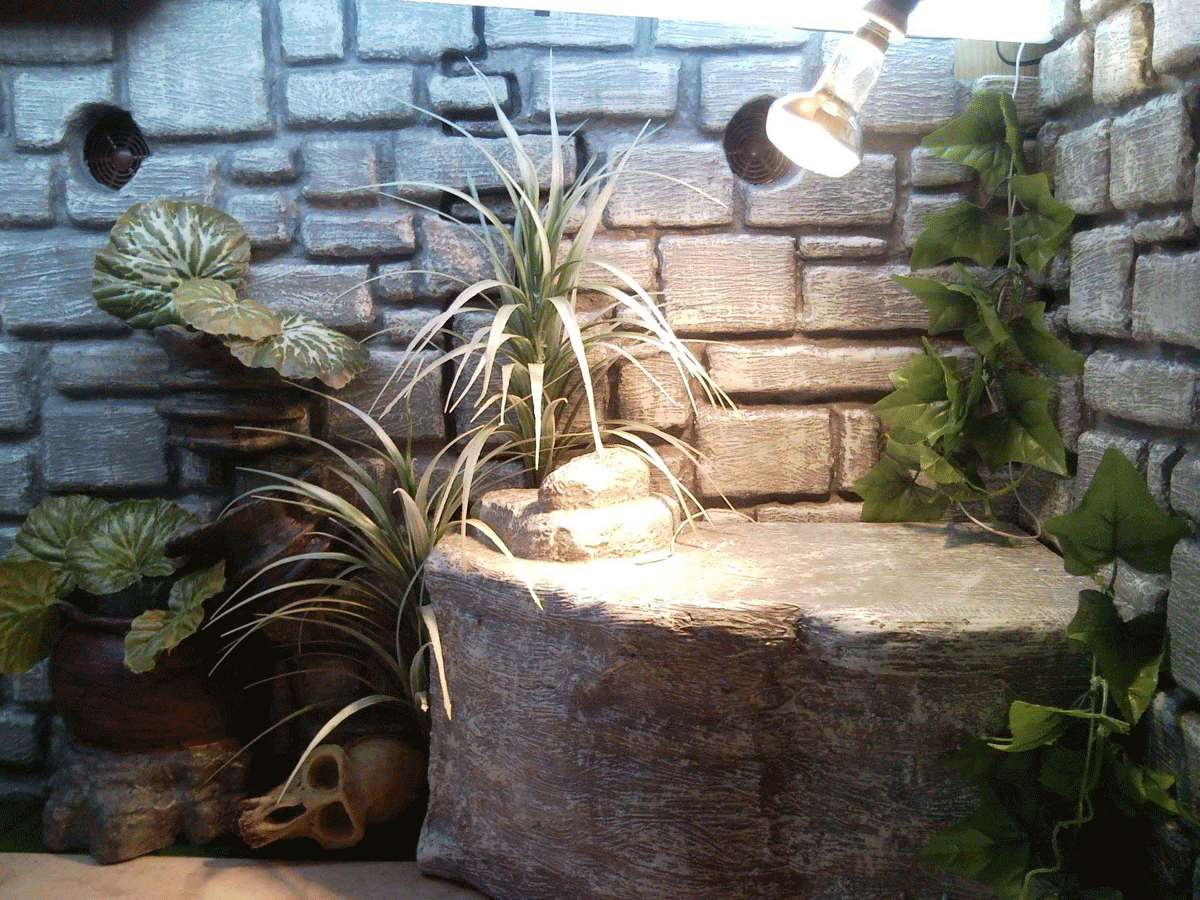
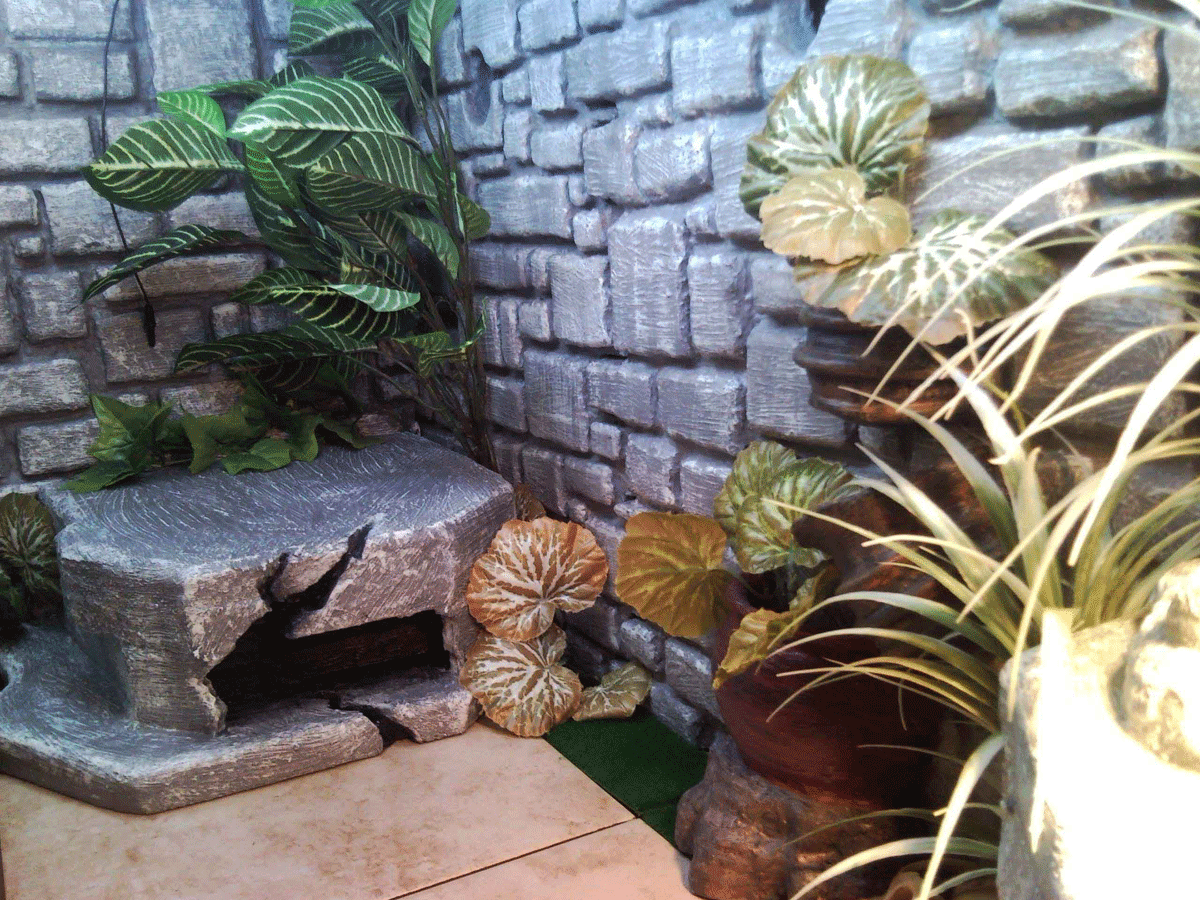
| Beth (Spring Hill, FL) built her beardie, Vashti, this wonderful platform! Beth's design is very unique, and she should be proud of her accomplishment. This just goes to show that building one of these platforms isn't that difficult if you put your mind to it. Great job Beth! | ||||||||||||||||||||||||||||||||||||||||||||||||||||||||||
 |
||||||||||||||||||||||||||||||||||||||||||||||||||||||||||
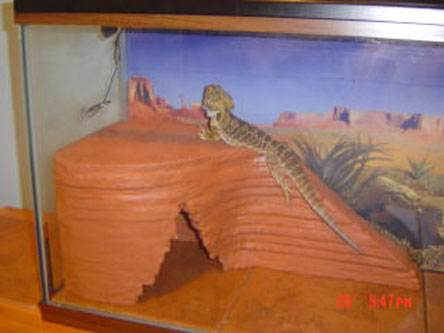
| Adam M. (New York) built a great looking and very functional platform for his beardie. He says he had a fun time making it too! Looks great Adam! | ||||||||||||||||||||||||||||||||||||||||||||||||||||||||||
 |
||||||||||||||||||||||||||||||||||||||||||||||||||||||||||
| Steve (Canada) - I took your advice on making my beardie a platform!! He loves it, and it was cool to make, although there were some times when I got impatient! haha. Thanks for the idea!! Here's a picture of Spike basking on his platform. | ||||||||||||||||||||||||||||||||||||||||||||||||||||||||||
 |
||||||||||||||||||||||||||||||||||||||||||||||||||||||||||
| James (Texas) - Hey just wanted to say you have a wonderful website and thanks for the idea and information on making the home made platforms. I added a couple of pictures of the platform I made for my son's beardie named Spikes. Spikes love his new platform as you can see and I enjoyed the creative process of constructing it. Thanks again. | ||||||||||||||||||||||||||||||||||||||||||||||||||||||||||
 |
 |
|||||||||||||||||||||||||||||||||||||||||||||||||||||||||
| Hello
veronica, I just wanted to say you have a great site! It's helped me a
lot with everything, I loved the platform idea. It was fun to make and
my dragon loves it! It also gives him a place to get closer to the uvb
light. I've attached some pictures of mine. Thanks again for the idea! -Tim |
||||||||||||||||||||||||||||||||||||||||||||||||||||||||||
 |
 |
|||||||||||||||||||||||||||||||||||||||||||||||||||||||||
|
I took the advice from your homemade platform page and this was the turn out. I hope you enjoy. Thanks, Jackie :) P.S. I used hard foam, 1 - 2 layers of sanded grout, and 2 - 3 coats of spray grout sealer. I will be sending more pictures ... just finished another platform. Thank you for the wonderful advice. |
||||||||||||||||||||||||||||||||||||||||||||||||||||||||||
 |
 |
|||||||||||||||||||||||||||||||||||||||||||||||||||||||||
| We
finally finished Tang's platform. It turned out pretty nice. Elisa |
Thanx
for the cage furniture "how to's." Check out what I came up
with... ~Jacob (Ohio) |
|||||||||||||||||||||||||||||||||||||||||||||||||||||||||
 |
||||||||||||||||||||||||||||||||||||||||||||||||||||||||||
| I
love your site!! And all of the information that is on it. My viv that
I made last spring for my female Bearded Dragon used to be very open and
boring with too much room so I decided to decorate it. I found your plans
for making platforms. So days went on while I planned and sketched tens
of designs. Then I followed your directions (took about 2 weekends). I
finished it about a month ago (forgot to send email). Anyways I really
wanted you to see what I made and was hoping that you could possibly post
it on your site with the other beardie owners' platforms. Let me know
what you think about my viv, the platform, and my beardie! :)
Thanks for
your time, |
||||||||||||||||||||||||||||||||||||||||||||||||||||||||||
 |
||||||||||||||||||||||||||||||||||||||||||||||||||||||||||
| Hi
Veronica,
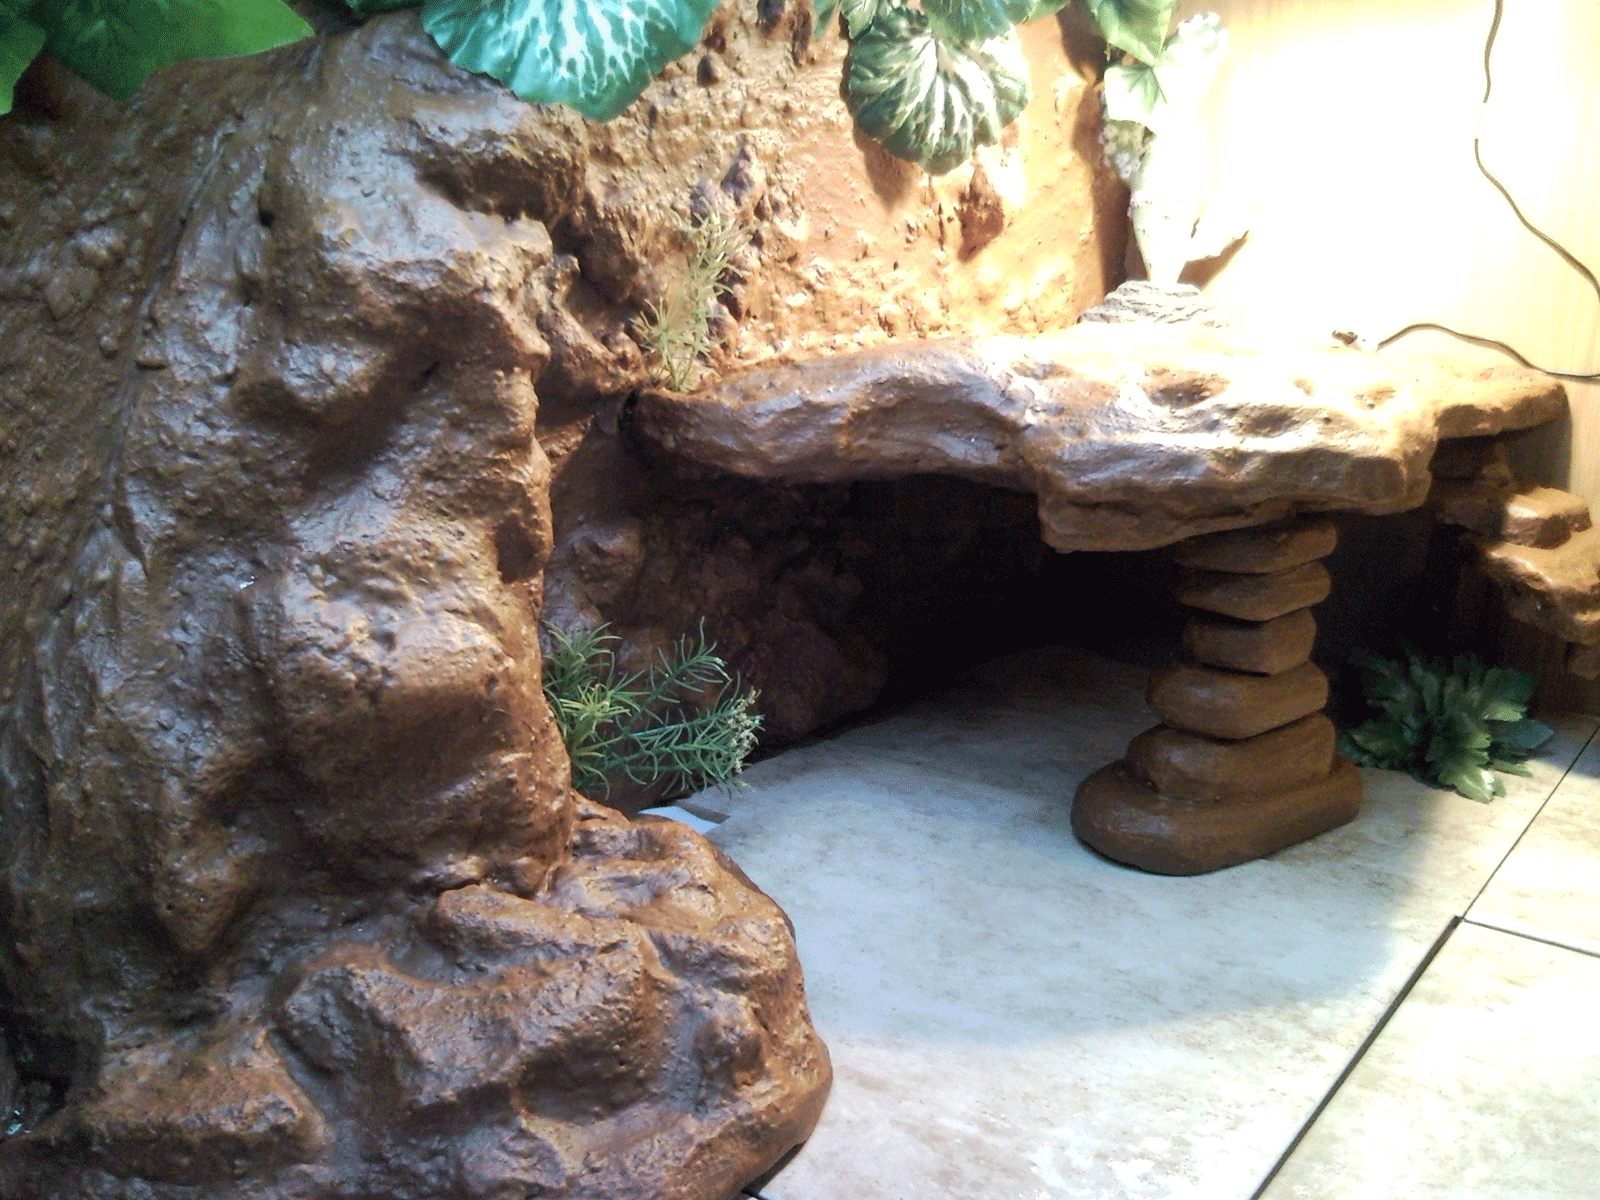
I just wanted to share with other reptile enthusiasts my Bearded Dragon's Rock wall! I made the rock wall in to separate parts - took me about 3 - 4 days working 5 - 6 hours everyday on it... but BOY DID IT SURE PAY OFF! This is my first ever big project that I can now be proud of and actually have it put into good use! Oh and thanks for such an amazing site. I really appreciate it! Lisa |
||||||||||||||||||||||||||||||||||||||||||||||||||||||||||
 |
 |
 |
 |
|||||||||||||||||||||||||||||||||||||||||||||||||||||||
|
Hello Veronica, We would like to thank you and all the friends of Beautiful Dragons for the guidance given to us to make their home comfortable and the help we needed for the raising and caring of these wonderful animals. After viewing your website and the submissions by friends, I proceeded to build their environment which saved us not only money but probably the headache of figuring out what and how to make it beautiful and safe. We went from a 26 gallon area to a wonderful 100+ gallon area to frollick in.
|
||||||||||||||||||||||||||||||||||||||||||||||||||||||||||
 |
 |
 |
||||||||||||||||||||||||||||||||||||||||||||||||||||||||
|
We made this with a paste of PVA abd sand, and sanded the walls. It took day but was well worth it, our lizard is much more active now and seems to love his new home! Natalie T. |
||||||||||||||||||||||||||||||||||||||||||||||||||||||||||
 |
 |
|||||||||||||||||||||||||||||||||||||||||||||||||||||||||
| Hello.
Here are a few pics of my enclosure that my father and I built after seeing
some custom ones from your page. Travis and Lyle Calgary, Alberta |
||||||||||||||||||||||||||||||||||||||||||||||||||||||||||
 |
 |
 |
||||||||||||||||||||||||||||||||||||||||||||||||||||||||
|
Beardie
rock wall by James M.
|
I wanted to send you some pictures of our bearded dragon habitat. We came up with this design based on the pictures from your website. This is made from 3/4" styrofoam, grout, and some stone texture spray paint. Have gotten some great feedback on this background from friends. Thanks for posting all of those designs. It was fun to create this with my 6 yr old daughter and 4 yr old son. | |||||||||||||||||||||||||||||||||||||||||||||||||||||||||
 |
 |
|||||||||||||||||||||||||||||||||||||||||||||||||||||||||
 |
 |
|||||||||||||||||||||||||||||||||||||||||||||||||||||||||
|
Your idea of making basking platforms was great and fun too. Merlin & Zena really like theirs. I've attached a pic. ~Ed (Petaluma, CA) |
The rocks look amazing but my camera doesn't show it too good but here are some pics. Thanks for all your help ~Mike |
|||||||||||||||||||||||||||||||||||||||||||||||||||||||||
 |
||||||||||||||||||||||||||||||||||||||||||||||||||||||||||
 |
||||||||||||||||||||||||||||||||||||||||||||||||||||||||||
 |
||||||||||||||||||||||||||||||||||||||||||||||||||||||||||
|
I built a platform like the ones on your site, but I coated it with stucco I had left over from a stucco job on my house. Stucco is hard to find, but is made specifically to be put on Styrofoam, so it was a piece of cake. One coat, and its hard as rock and looks really nice. Also you can put on the stucco much more smoothly, but I liked the rough look and figured it gives the little guys more to hang on to. ~Chris H. |
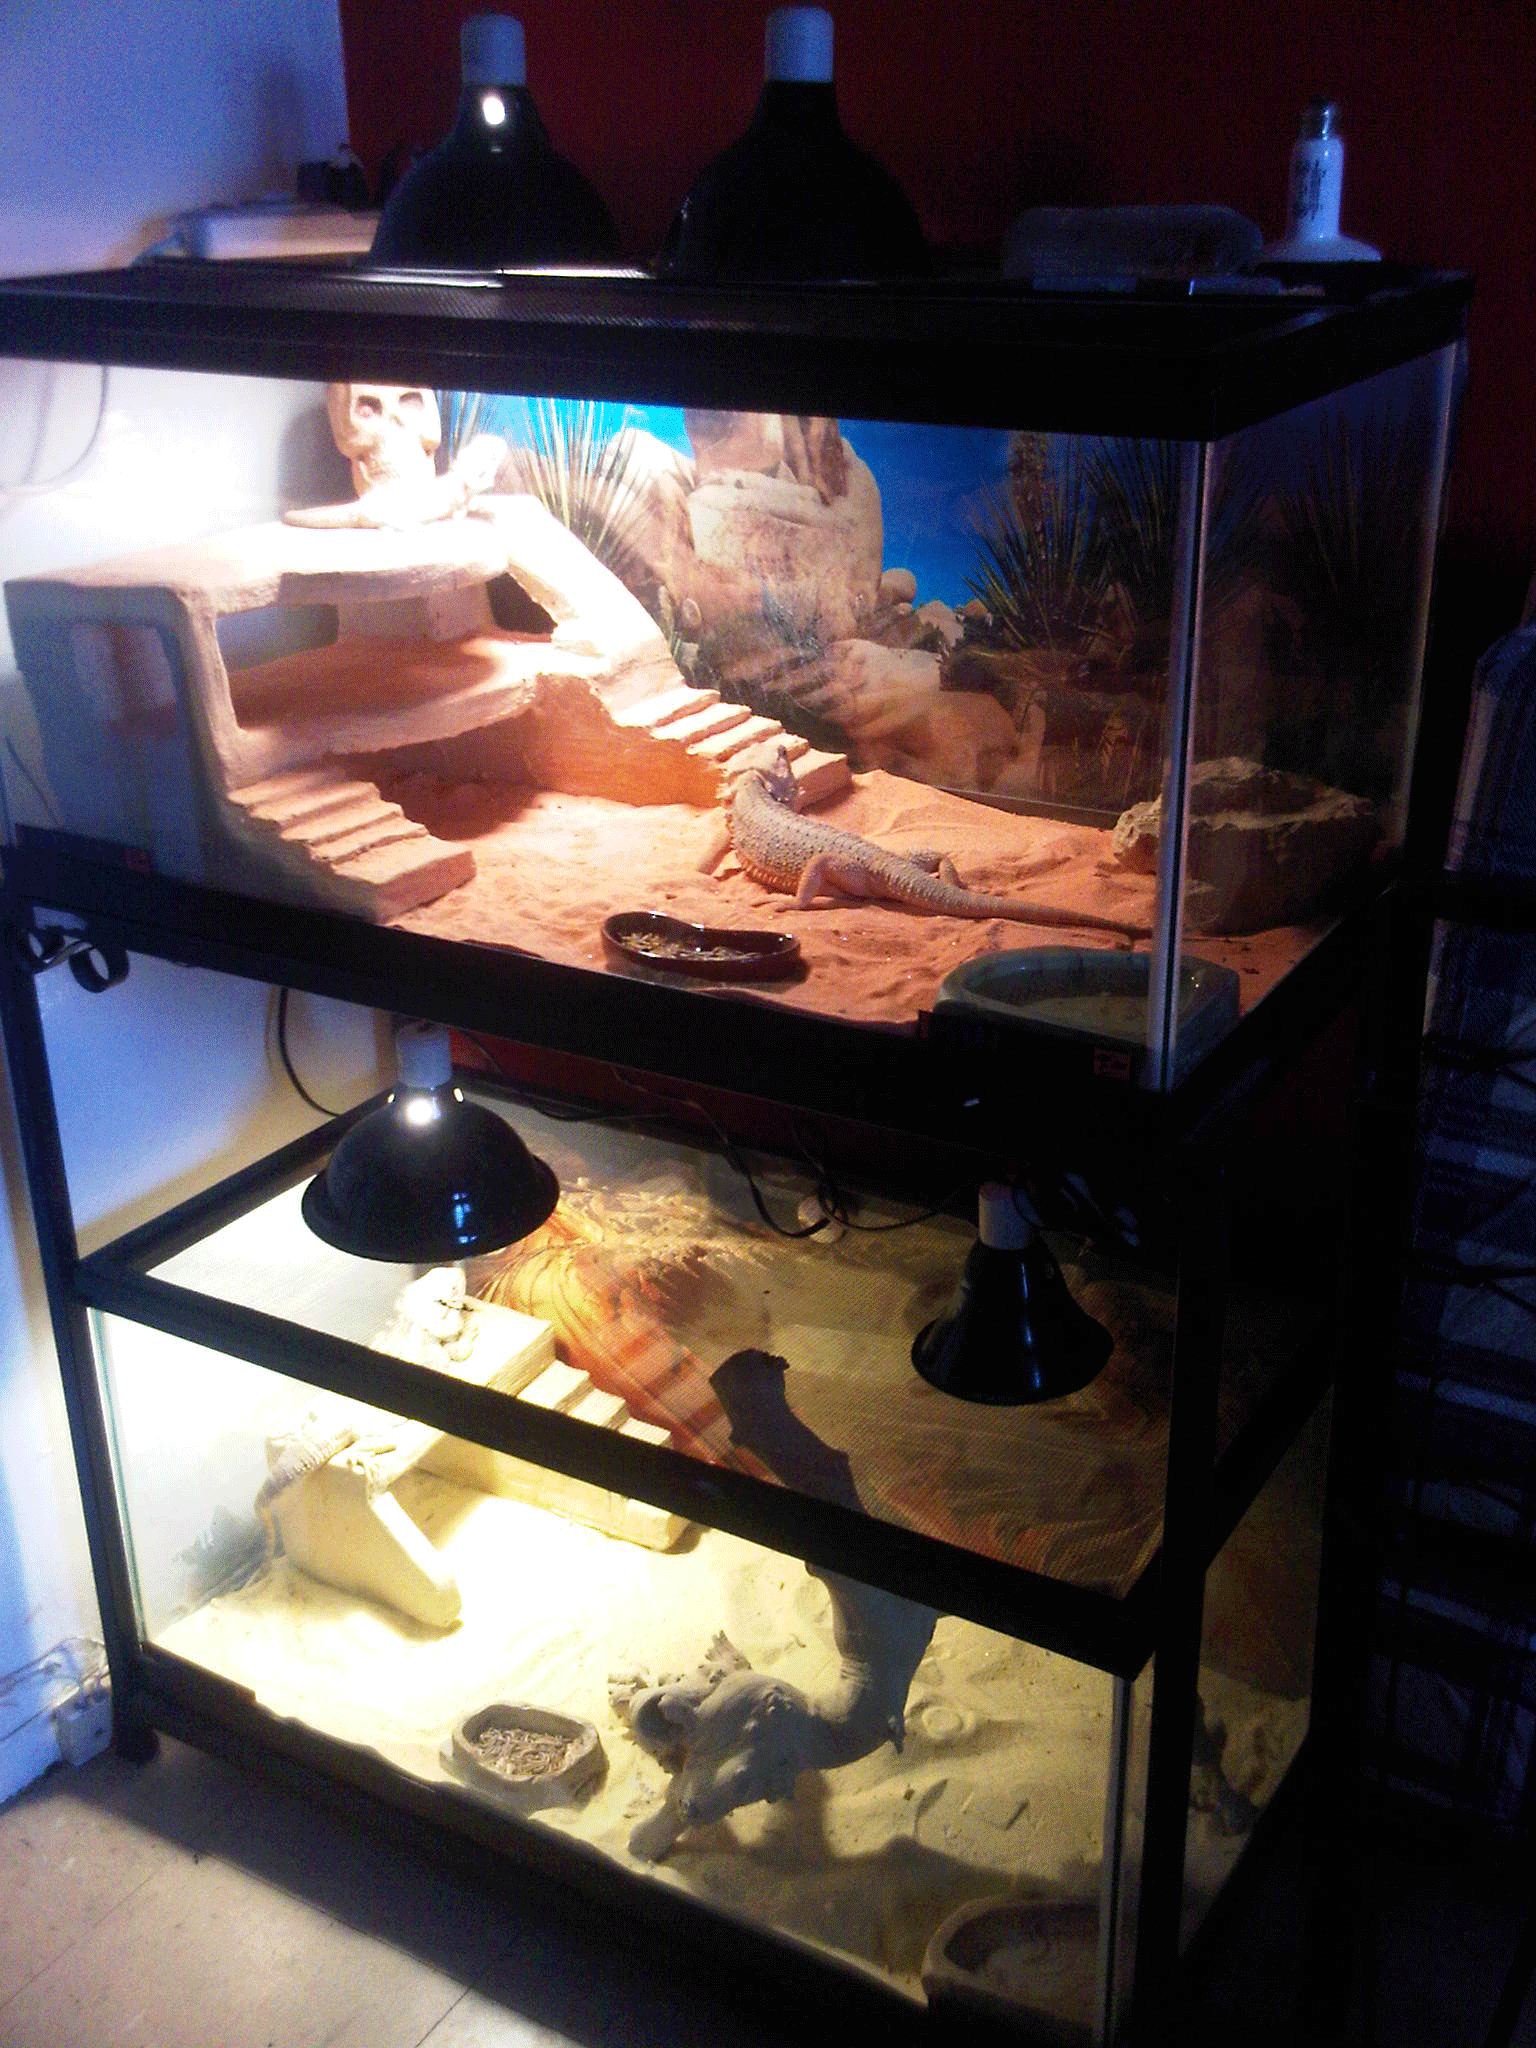
This DIY project worked great for me. And my babies love their new stands. (In yellow. My Big boy JaBBah) In the top tank my Female Jah Jah, and my lil Baby boy Juno. Yes he is missing a leg, I adopted him from a very crowded pet store. Building both of them only took me 2 and a half days. Thanks Again!! | |||||||||||||||||||||||||||||||||||||||||||||||||||||||||
 |
||||||||||||||||||||||||||||||||||||||||||||||||||||||||||
 |
 |
 |
||||||||||||||||||||||||||||||||||||||||||||||||||||||||
|
My custom fake rock wall and basking platform. ~Monique |
Thanks for your site it was fun to build. Larry is loving it! ~Tonya |
|||||||||||||||||||||||||||||||||||||||||||||||||||||||||
 |
 |
 |
 |
|||||||||||||||||||||||||||||||||||||||||||||||||||||||
|
Thanks for the ideas. My beardie loves it! He has his little wood tunnel that leads him to his private hidden room under his plattform. Can't wait to get started on his adult setup. ~William |
||||||||||||||||||||||||||||||||||||||||||||||||||||||||||
 |
 |
 |
||||||||||||||||||||||||||||||||||||||||||||||||||||||||
 |
||||||||||||||||||||||||||||||||||||||||||||||||||||||||||
|
I recently used your tutorial to make my own platform for my beardie's new cage! Here are some before, during, and after photos. I'm still waiting to put on the final coat of sealant before it can go in parmanently, but I stuck it in there for a few minutes just to see how he liked it... and he did! Thanks! ~Alya |
I just love your website! So helpful, and I just finished my first basking platform. Rango and Lizzy LOVE it. Such a WONDERFUL idea, and so easy to make! Already starting their food dish platform. Thank you for the wonderful web site!!! | |||||||||||||||||||||||||||||||||||||||||||||||||||||||||
 |
 |
 |
||||||||||||||||||||||||||||||||||||||||||||||||||||||||
| Thanks
for your advice. This is how my first try came out. I had fun doing it
and I think Rango likes it too!
~Jill |
My exterior wall (background) and cave that I made using your DIY instructions. Extremely simple and looks great! ~Randal |
|||||||||||||||||||||||||||||||||||||||||||||||||||||||||
 |
 |
 |
||||||||||||||||||||||||||||||||||||||||||||||||||||||||
 |
||||||||||||||||||||||||||||||||||||||||||||||||||||||||||
|
Here are a few pics of my enclosures that I have made... ~Glenn (Australia) |
||||||||||||||||||||||||||||||||||||||||||||||||||||||||||
 |
 |
 |
 |
|||||||||||||||||||||||||||||||||||||||||||||||||||||||
 |
||||||||||||||||||||||||||||||||||||||||||||||||||||||||||
|
I built this platform prior to getting my beardie, Shemp. It took a little while to put together and I did it in two sections, which I added on to as he grew. I used polystyrene, tile grout, sealer, and play sand. My advice is to make sure when you fit it to the tank make sure you can take it out of the tank when needed. ~Aaron |
Made in 3 days with polysytyrene, grout, paint, and non-toxic pva sealant. ~Danny |
|||||||||||||||||||||||||||||||||||||||||||||||||||||||||
 |
 |
 |
 |
|||||||||||||||||||||||||||||||||||||||||||||||||||||||
 |
||||||||||||||||||||||||||||||||||||||||||||||||||||||||||
|
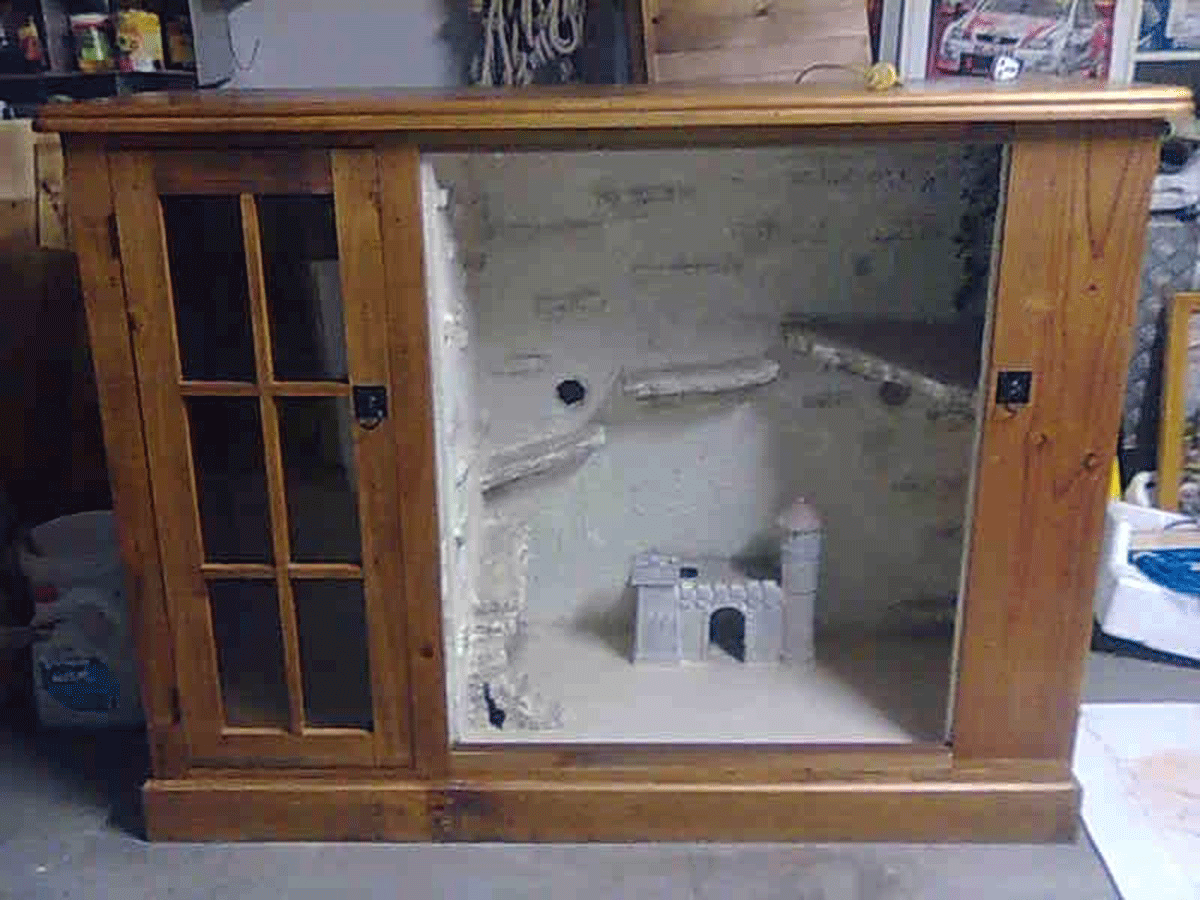
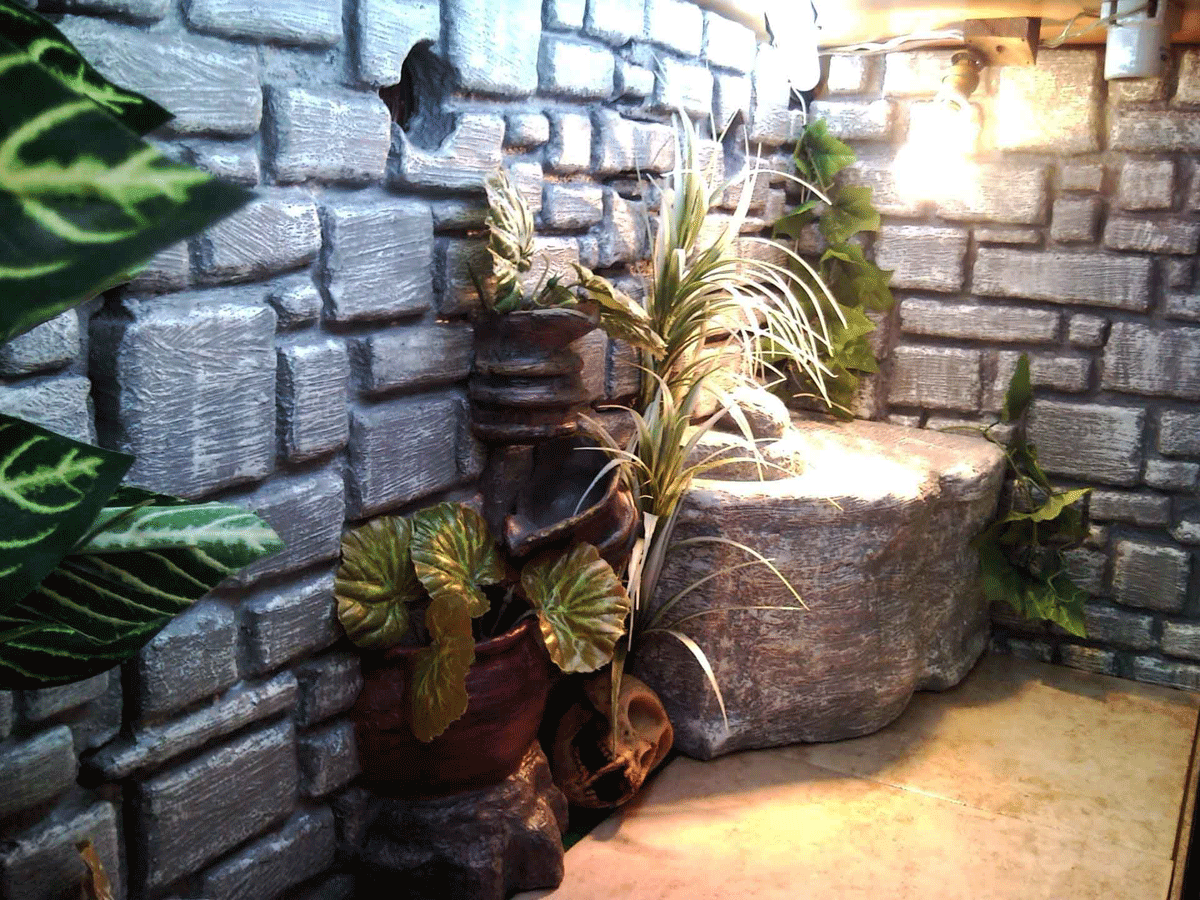
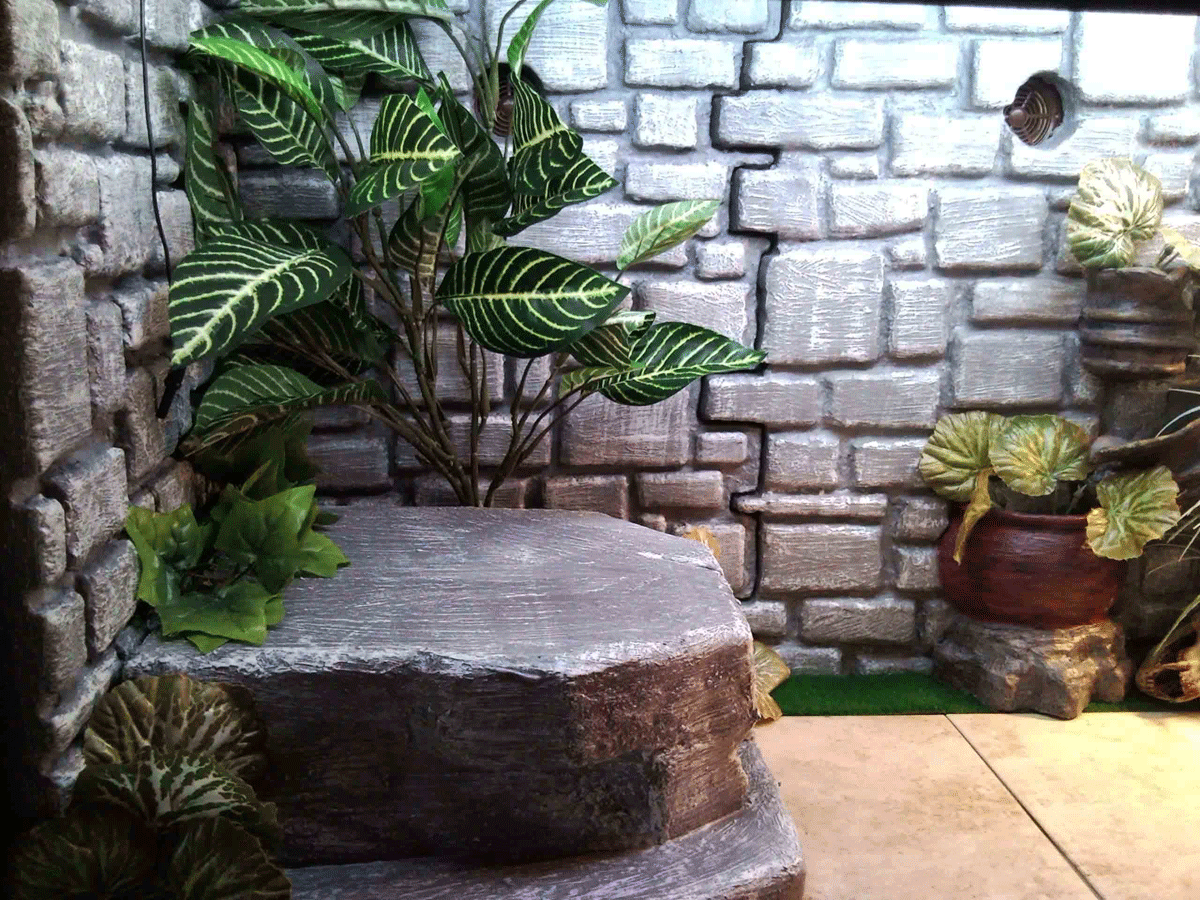
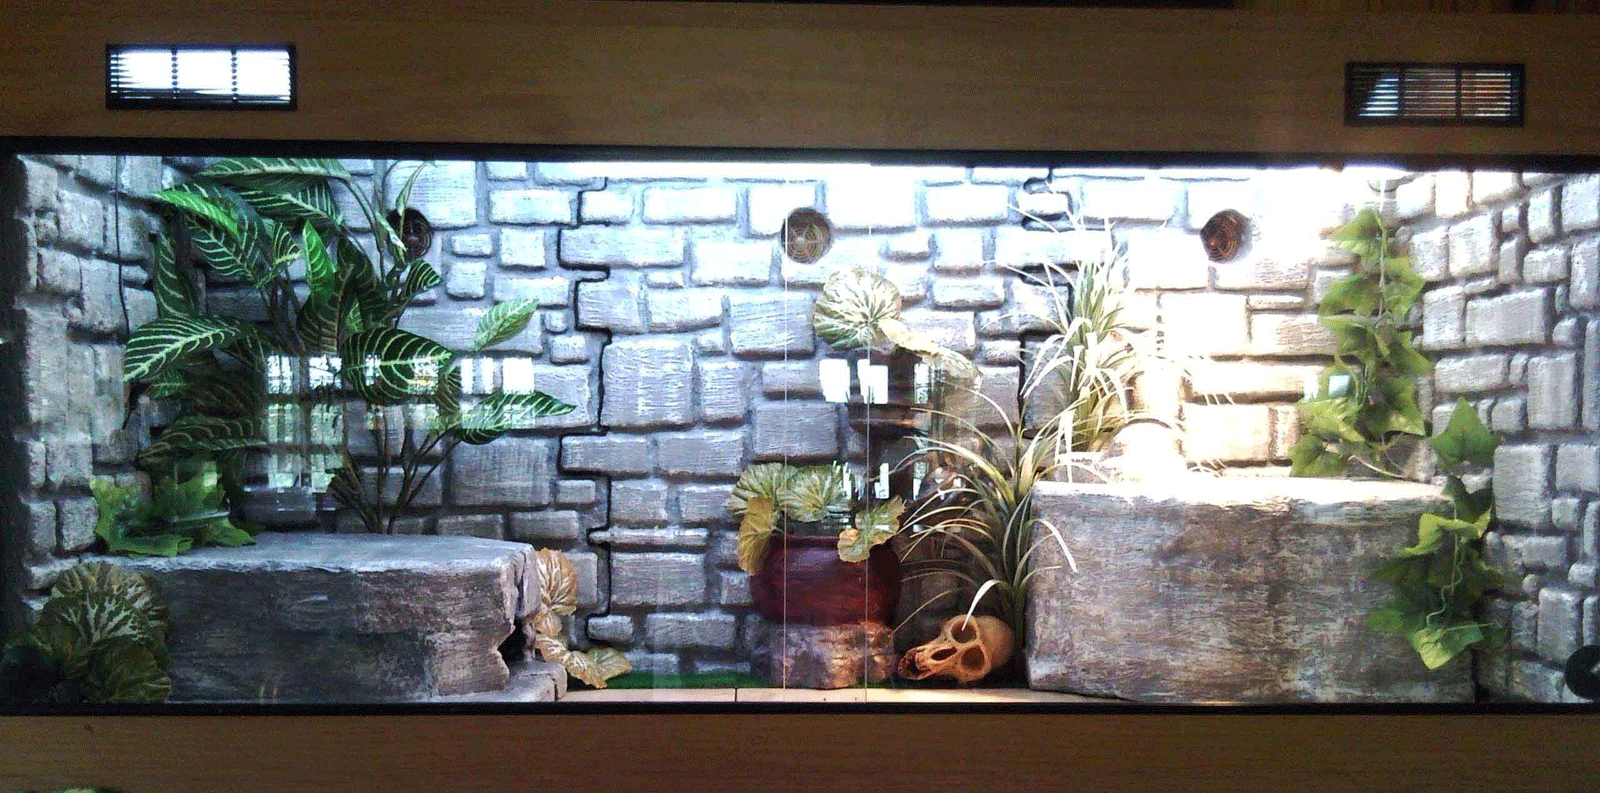
Here is my second attempt. A Dungeons and Dragons type theme. ~Monique |
||||||||||||||||||||||||||||||||||||||||||||||||||||||||||
|
Email
me with a pic if
you'd like to share your creation/advice with others.
|
||||||||||||||||||||||||||||||||||||||||||||||||||||||||||
|
|
||||||||||||||||||||||||||||||||||||||||||||||||||||||||||
|
Copyright
© Beautiful Dragons. All Rights Reserved.
This website may not be copied or reproduced without my permission. |
||||||||||||||||||||||||||||||||||||||||||||||||||||||||||